Try vim (even in Xcode!)
Summary
A co-worker told me a while back that I should learn vim or emacs. When asked why, he noted that learning one of them would not only help me edit text files faster, which means editing code faster, but learning one would help me become a more adaptable developer by reducing my reliance on IDEs. He suggested that I start writing notes using one of them to get started and to see what I thought. I chose to try out vim, and although I still write my notes like he suggested, vim has turned into one of my most useful and rewarding tools (I am sure emacs would have provided me with similar benefits). Some reasons why:
- Faster editing of text files, which means I can code faster! The more time you put into learning and customizing vim the more efficient you will get at editing text and code.
- When learning new languages or diving into new projects, you continue to feel comfortable with editing and navigating that code since you continue using your already familiar vim setup — no need for a new IDE or another text editor every time you change contexts (unless that platform strong arms you into using their IDE like iOS development and Xcode…). Ultimately, you end up worrying less about an IDE and better focus on learning what you need to be successful.
- Beyond my iOS/macOS development, I have been venturing into all sorts of different projects ranging from this blog, Swift scripting, backend development in Python, some ReasonML script work, frontend React/Redux development, and AWS Lambda tinkering (and I am sure more to come). At each turn, I don’t have to worry too much about my editing experience. I add some syntax highlighting and function tags to my vim setup, and I am off! Even though I switch languages and projects, vim helps remove one hurdle by always remaining constant. A similar thing can be said about architectures like Rx. If you learn Rx, you can more easily get up to speed on different projects that use Rx since the fundamental concepts are the same no matter what platform you are on.
- Maybe this is specific to me, but when I use vim I feel like one of those cool hackers on tv that is clicking away making awesome things happen in their terminal. Because of this, as I continue to get better at using vim, I feel like more of a developer. You absolutely don’t need to know vim to be a great developer, but this mental trick helps me overcome some of my impostor syndrome.
- You learn more about how your system works.
- vim goes back a long way. So much so that most systems have vim, or vi, ready to be used. This is great if you are ssh-ing into a server and need to do a quick file edit.
- As you discover all the power that vim offers, you begin to see many different parts of your system like how program processes work, stdin/stdout, dotfiles, how to use Unix programs, and the list goes on.
- Learning a new technology helps in ways that you can’t predict. When I first started using vim, I never thought that I would:
- be able to port my vim editing skills to Xcode. Turns out there is a great open source project called XVim2 to get vim key bindings in Xcode — more on that later!
- use vim for all of my text/code editing needs.
- enjoy the community of vim developers / users. Learning from them has helped me grow from a totally different perspective since vim transcends programming language and project.
- find so much joy in using a text editor.
Tips for getting started with vim
- Just like my friend suggested, try starting by taking notes in vim.
- To start a vim session, simply open up terminal and type
vim.
- To start a vim session, simply open up terminal and type
- How vim works (a great simplification):
- There are two modes.
- Normal mode — where you move around and execute vim commands. You start in this mode when you enter vim. You can enter commands in normal mode by pressing
:followed by the command. Examples of commands are: find and replace text, searching like using grep, executing shell commands, opening quick fix menu, and using plugins. - Insert mode — where you can enter text. You enter this mode by pressing
iwhen in normal mode. To enter normal mode from insert mode you pressesc.
- Normal mode — where you move around and execute vim commands. You start in this mode when you enter vim. You can enter commands in normal mode by pressing
- To exit vim go to normal mode and press:
: + q— quit if no changes were made to the file.: + wq— quit and save changes.: + q!— quit without saving changes (force quitting).- See this Stack Overflow question for more info on exiting vim.
- There are two modes.
- Start off by doing the built in vim tutorial.
- From terminal enter
vimtutor.
- From terminal enter
- A great resource for learning vim over time: Seven habits of effective text editing.
- If you like video tutorials, Vimcasts are really great!
- Great reference book on vim, Practical Vim.
- If you are interested, here is a nice history of vim.
- As you dive further into vim, you will learn that you can customize vim however you want. You do this by adding to a
~/.vimrcfile (which you can edit using vim 🤯). I host my vimrc file on github, so feel free to take a look. I try to comment that file well enough to help other people, including future me, to better understand what is in there.
How to get vim keybindings in Xcode
- The below steps are for XVim2.
- Assumes Xcode 9+.
- The documentation for XVim2 is pretty good. The only thing that can be a bit confusing is that the steps are broken up into two documents: re-signing Xcode & installing vim keybindings in Xcode. The below steps are simply a combination of the two with some personal experience written in to help.
- You will need to re-sign Xcode with your own certificate 😅. You used to be able to install 3rd party plugins like this one directly into Xcode, but Apple has since removed this capability. This may seem a little crazy, but if you want to have vim integration, this is what you need to do until Apple brings this kind of plugin functionality back 🤞.
- Something to keep in mind: Your self-signed Xcode certificate will expire in a year, so you will need to create a new certificate after a year and re-sign Xcode again.
- Similar to having a vimrc file to customize vim, you can customize vim in Xcode by creating a
~/.xvimrcfile. Personally, I am okay not having this since you are using vim in Xcode and not all your customizations will work the same. Xcode has a bunch of shortcuts that I use instead. - If you have any issues, make sure to read through the docs for XVim2 on github (link above).
Step A: Re-sign Xcode
If you have done this before, you can skip down to #7.
- Close Xcode.
-
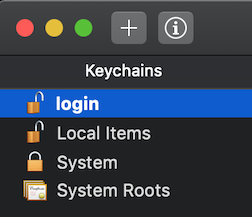
Open Keychain Access and select login in the left pane.
-
From the top menu, select:
Keychain Access->Certificate Assistant->Create a Certificate....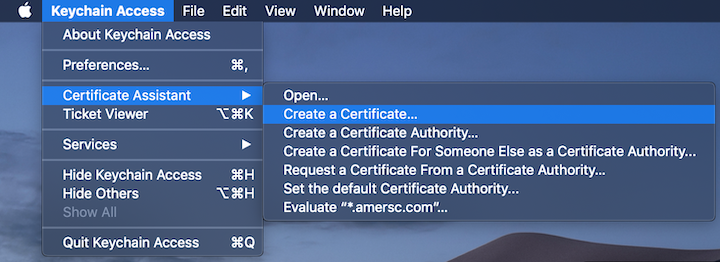
- Change name to
XcodeSigner. -
Change Certificate Type to
Code Signing.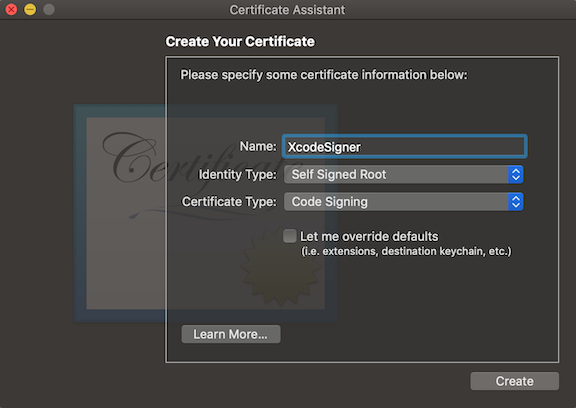
- Press Create.
- Assuming Xcode is in your Application folder, run this in terminal to re-sign Xcode:
sudo codesign -f -s XcodeSigner /Applications/Xcode.app
- Be patient as the code signing will take some time.
Step B: Integrate vim into Xcode
- Either:
git clone https://github.com/XVimProject/XVim2.gitor- If you have XVim2 cloned already,
cdto the XVim2 repo andgit pull.
- Confirm xcode-select points to your Xcode by running
xcode-select -p.- You should see this output: /Applications/Xcode.app/Contents/Developer.
- If this doesn’t show your Xcode application path, use
xcode-select -sto set it.
- If you haven’t already,
cdto the XVim2 folder. - Run
makein your terminal. - Optional: Create a xvimrc to customize vim in Xcode ->
~/.xvimrc.- One thing to note is that some things are a little difficult to get working such as vim syntax highlighting since you are in the context of Xcode.
- Launch Xcode.
-
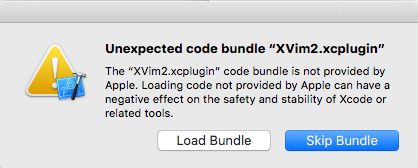
When Xcode detects that there is an unexpected bundle XVim2.xcplugin, you want to Load Bundle.
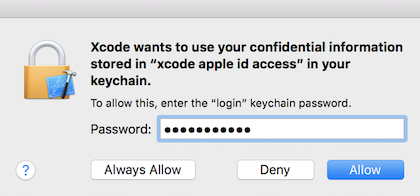
- Xcode will then ask you for keychain access, which you need to give it.
- Be patient with the number of times Xcode prompts you for keychain access. This is just a quirk about Xcode.
- Note: If you accidentally press Skip Bundle or deny keychain access, close Xcode and enter this into terminal:
defaults delete com.apple.dt.Xcode DVTPlugInManagerNonApplePlugIns-Xcode-X.X.- Where X.X is your Xcode version.
More advanced tip
- If you have a code formatting tool that you like to use (e.g., Swift - SwiftFormat, Python - Black), you can easily format the code in your current buffer (the file you have open in vim) by doing:
:%!SwiftFormat- Here is a tweet showing this in action using SwiftFormat
Feel free to reach out on Twitter — cheers!