Websites using Swift and AWS Lambda — Part 2
If you haven’t already, check out Part 1.
Summary
Want to see this kind of Swift website in action!? Check out the example website, and here is the source code!
This is the second part in a two part series of posts about making websites using the Swift programming language and Amazon Web Services (AWS). The first part focused more on the technical details of what this even means and how to set up a Swift project to generate a Swift website: both for local development and for making an executable ready for AWS Lambda. This post will pick up from there with a few notes about pricing before diving into the details on how to deploy & host this kind of website!
Even if you didn’t look at the first part (or skimmed it 🙃), I tried to provide enough details to make this a useful overview of AWS.
Yes, you will need an AWS account to do the following, and if you are worried about cost — me too! Check out the section on pricing below.
Hosting using Amazon Web Services (AWS)
As mentioned, this project makes use of AWS to provide the infrastructure to deliver a Swift generated website. To accomplish this from a high level, API Gateway provides us with a URL to put in a web browser that triggers an AWS Lambda function, which runs our generate website Swift code (that we made in Part 1), to make HTML/CSS that is then returned and rendered as a website 🎉.
Before we start, a couple things worth noting:
- This post uses AWS, but there are other services out there to check out like Vapor, IBM Kitura, and OpenWhisk.
- The dashboard for all Amazon Web Services, the AWS console, is notorious for having a steep learning curve. As we dive into the different services, I will to do my best to explain each step so that we don’t get lost in all the different AWS buttons and levers 😶.
- The easiest way to find a service that you are interested in (e.g., Lambda & API Gateway) is to type the name into the search bar at the top. For now, forget about the rest of the ways to navigate around. Here are two examples of what the search bar looks like on different pages:
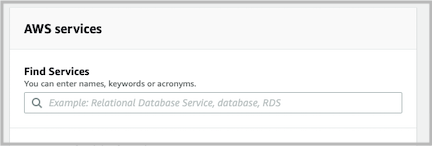
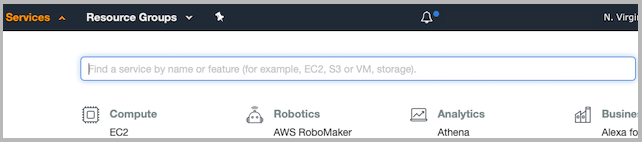
- The easiest way to find a service that you are interested in (e.g., Lambda & API Gateway) is to type the name into the search bar at the top. For now, forget about the rest of the ways to navigate around. Here are two examples of what the search bar looks like on different pages:
Pricing
You will need an AWS account for this post. Yes AWS is not free, but I wouldn’t get caught up thinking about cost too much unless you think you will have millions of requests coming in. Even at that point, you won’t be paying much for the services used in this post. Let’s take a look!
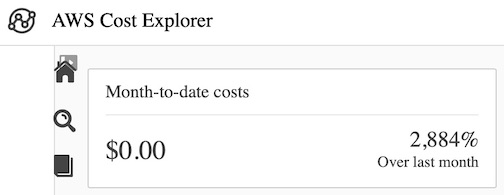
Personal experience
Part 1 of this post ended up getting a decent amount of exposure having been picked up by some weekly newsletters (iOS Dev Weekly issue 394 and Swift Weekly issue 150), and in turn so did the example website. With that flood of traffic, my AWS bill was at one point showing a ~5000% increase in my monthly cost, totaling a whole $0 😂. Here is a screenshot prior to hitting that ~5k% mark.
Some math
Not fully convinced? Let’s do some back of the envelope calculations to further prove the point:
- AWS Lambda
- Compute charges — AWS Lambda has a free tier of 400,000 GB-s per month. If you back calculate from this, you can have over 3 million executions for free!! This calculation assumes 1 second per function run with under 128MB memory used. Each execution of the example website fits comfortably in these constraints, but even if it didn’t I think I can spare some of the 3 million requests assumed to make up for the higher runtime/memory usage 😝.
- Request charges — Also, assuming the 3 million requests above, AWS charges $0.20 per million after 1 million free requests. So, you would have to pay $0.40!
- Here is a neat little price calculator too!
- API Gateway
- Pricing for API Gateway is pretty simple — $3.50 per million calls. Hopefully if you are experiencing millions of requests per month, you can afford the cost 🙃.
- AWS Certificate Manager
- Public certificates are free.
Fair to say, running your website like this is effectively free! Costs of course may vary from the time of this writing, but the end conclusion will be likely similar.
Additional things to note
- AWS offers a great first year free tier with even more free offerings. If you are still hesitant, create a new account and cancel after the first year.
- As with most things, once you create an account with AWS, make sure you keep your credentials private. If you create an ssh key for AWS, you wouldn’t want to accidentally expose that publicly and potentially have people running up your bill 😅.
Make a Swift runtime for AWS Lambda
How does Swift code run in an AWS Lambda function without being one of the out of the box supported languages (e.g., python, javascript)!? We will need to make an environment that will allow our Swift code to run in AWS Lambda.
To accomplish this, we’ll use a newer addition to AWS called AWS Layers to create a Swift runtime for our AWS Lambda function to run Swift code. AWS Layers can do more than make runtimes for different languages and is worth checking out to see how powerful AWS Lambda is with this addition!
To make the runtime, clone this project and follow the readme to get a Swift runtime uploaded to AWS. The above project is also the same project that we use to let our Swift code communicate with Lambda function in the first part of these posts!
After creating the Layer, copy the ARN! We will use it in the next section to reference this Layer from Lambda.
Note: ARN stands for Amazon Resource Name, and is a string that uniquely identifies different AWS resources like the Layer you created here. If you want to learn more, read up on ARNs.
As I noted above, I used this project to create the Swift runtime for AWS Lambda. There are other similar projects that are worth checking out too. The below references come from this Swift forum’s post.
- Swift Custom Runtime Lambda
- AWS Lambda Swift Runtime — I am not sure about the level of maturity for this project.
- Smoke Framework — This project hopes to add AWS Lambda support in the future.
The AWS Lambda function
With the Swift runtime Layer ready, we can now set up our Lambda function with our Swift code to generate HTML/CSS for our website!
Note: The below goes through the manual way to create and configure a Lambda function. There are other ways like using the AWS commandline interface (CLI).
- In the AWS search type in, and select,
Lambda.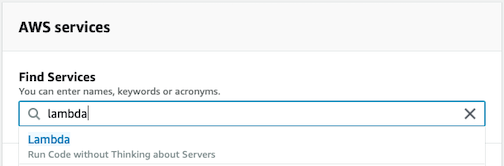
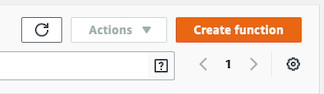
- Next, click to create a new Lambda function
- You will be presented with this:
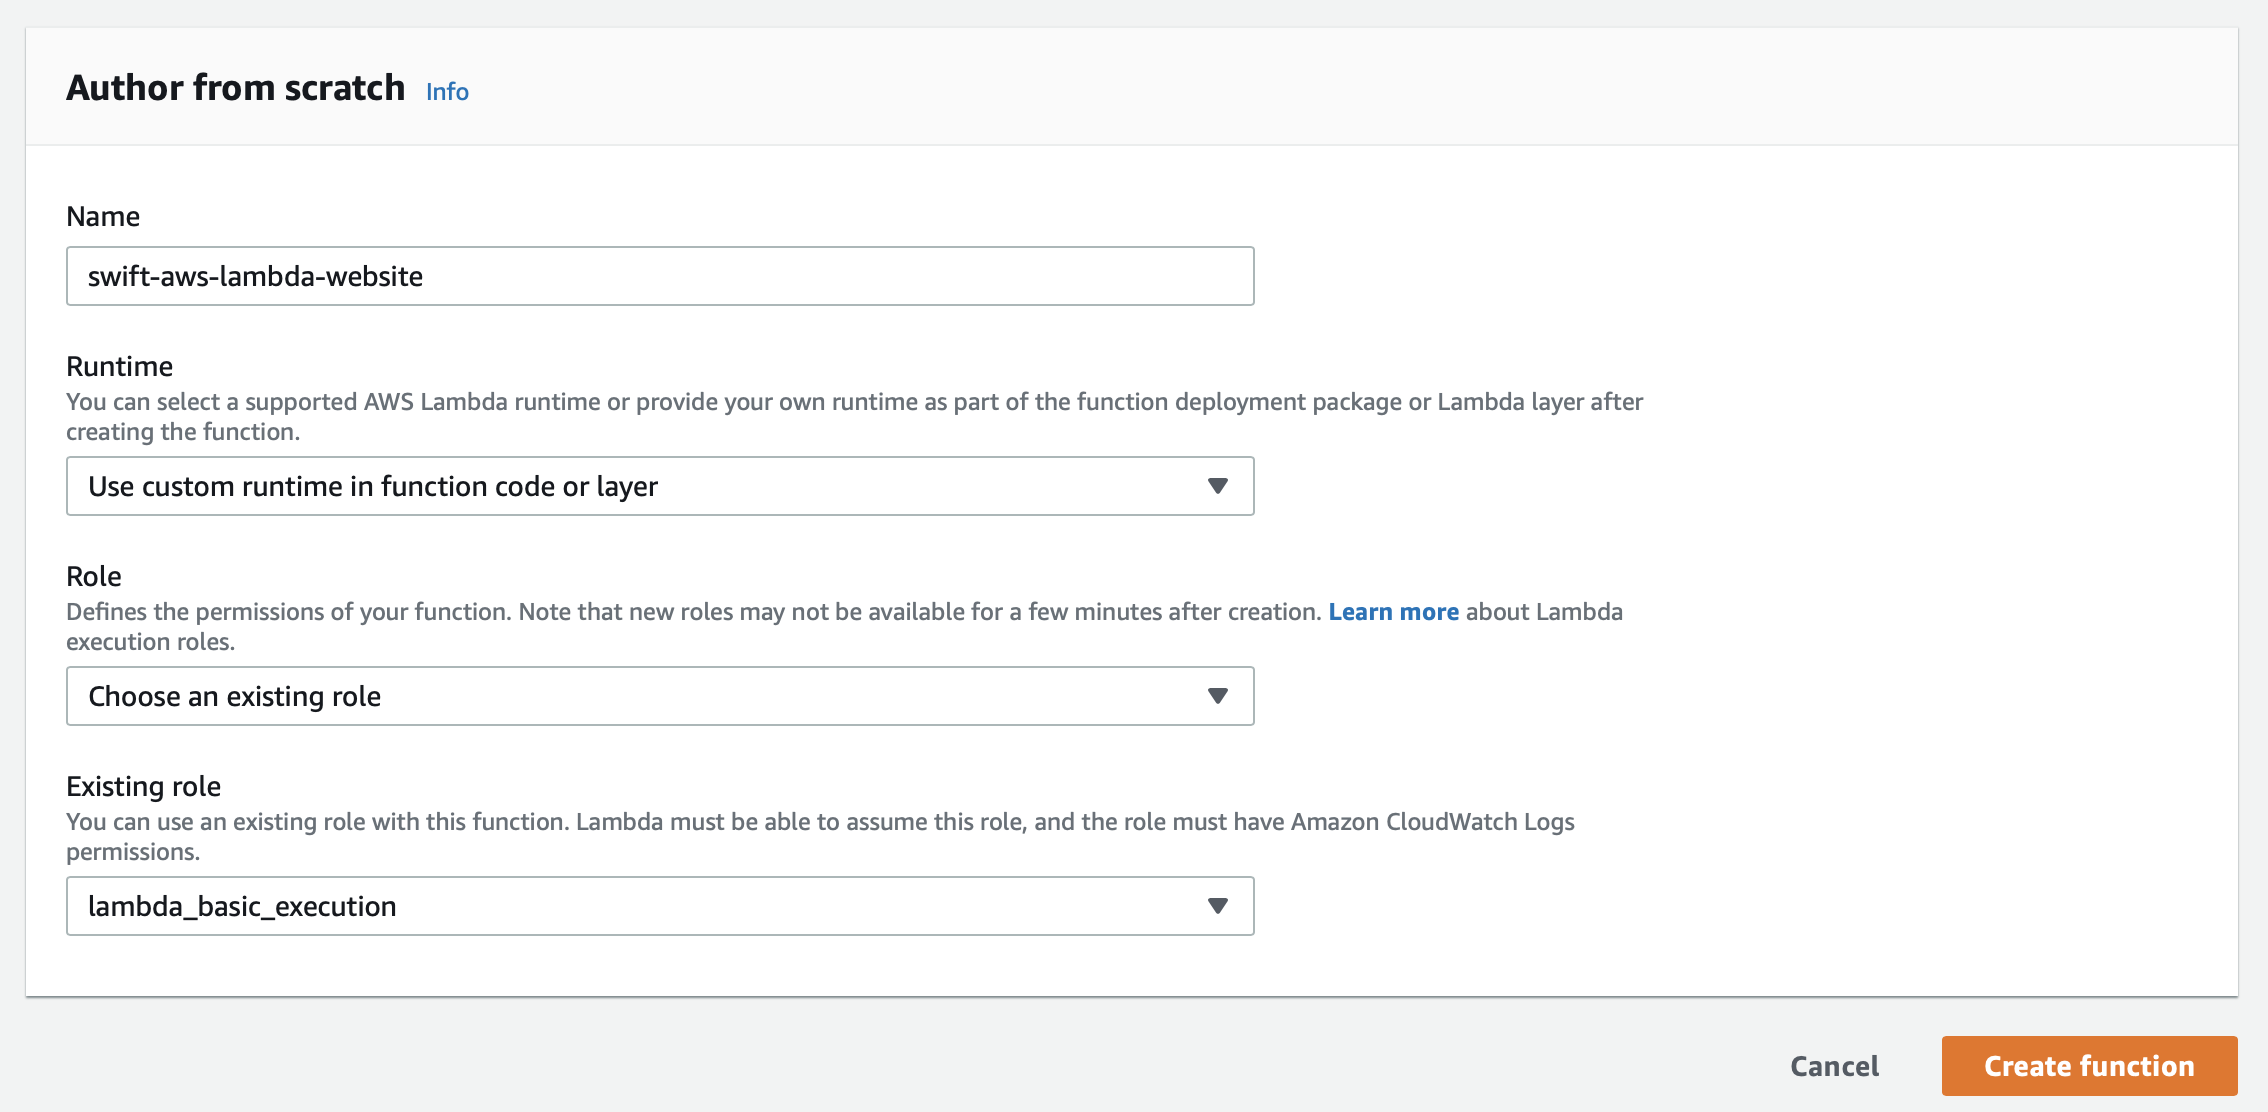
- Give your Lambda a
Name. - Choose to use a custom
Runtime(we will be using the Swift runtime created in the previous section — more on this later). - The next two options are to define a
Role, which is used to define permissions and security that you want to grant your Lambda function. I chose to go with an existing basic execution role. If you want to learn more about roles, check here. - Click to create your function!
- Give your Lambda a
- When your newly created Lambda function opens, there will be an intimidating amount of things to sort through (at least there was for me). Working form top-right to top-left, some notable things.

- When you make changes to your Lambda function, you will need to press Save for the changes to take effect. Think of this like updating your current git commit, git amend, but these changes are live!
- You can test your Lambda by pressing Test on the top right. This won’t do anything meaningful right now since we haven’t added any code to run/test yet.
- The Actions dropdown includes the ability to version your Lambda function. Think of this like a combination of a git commit and deployment. This lets you lock in a version of your Lambda function, which you can use later to roll back to a previous version of your function if needed. I recommend you use this in case you need to go back to a previous working version of your Lambda function, or if someone overrides your Lambda function accidentally 😅.
- The Qualifiers dropdown is where you manage your Lambda function versions.
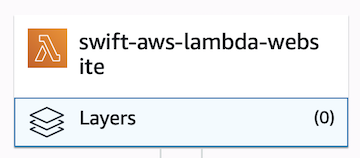
- Next, we need to link the Swift runtime that we created above to this newly created Lambda function. Find and click on the Layers option.
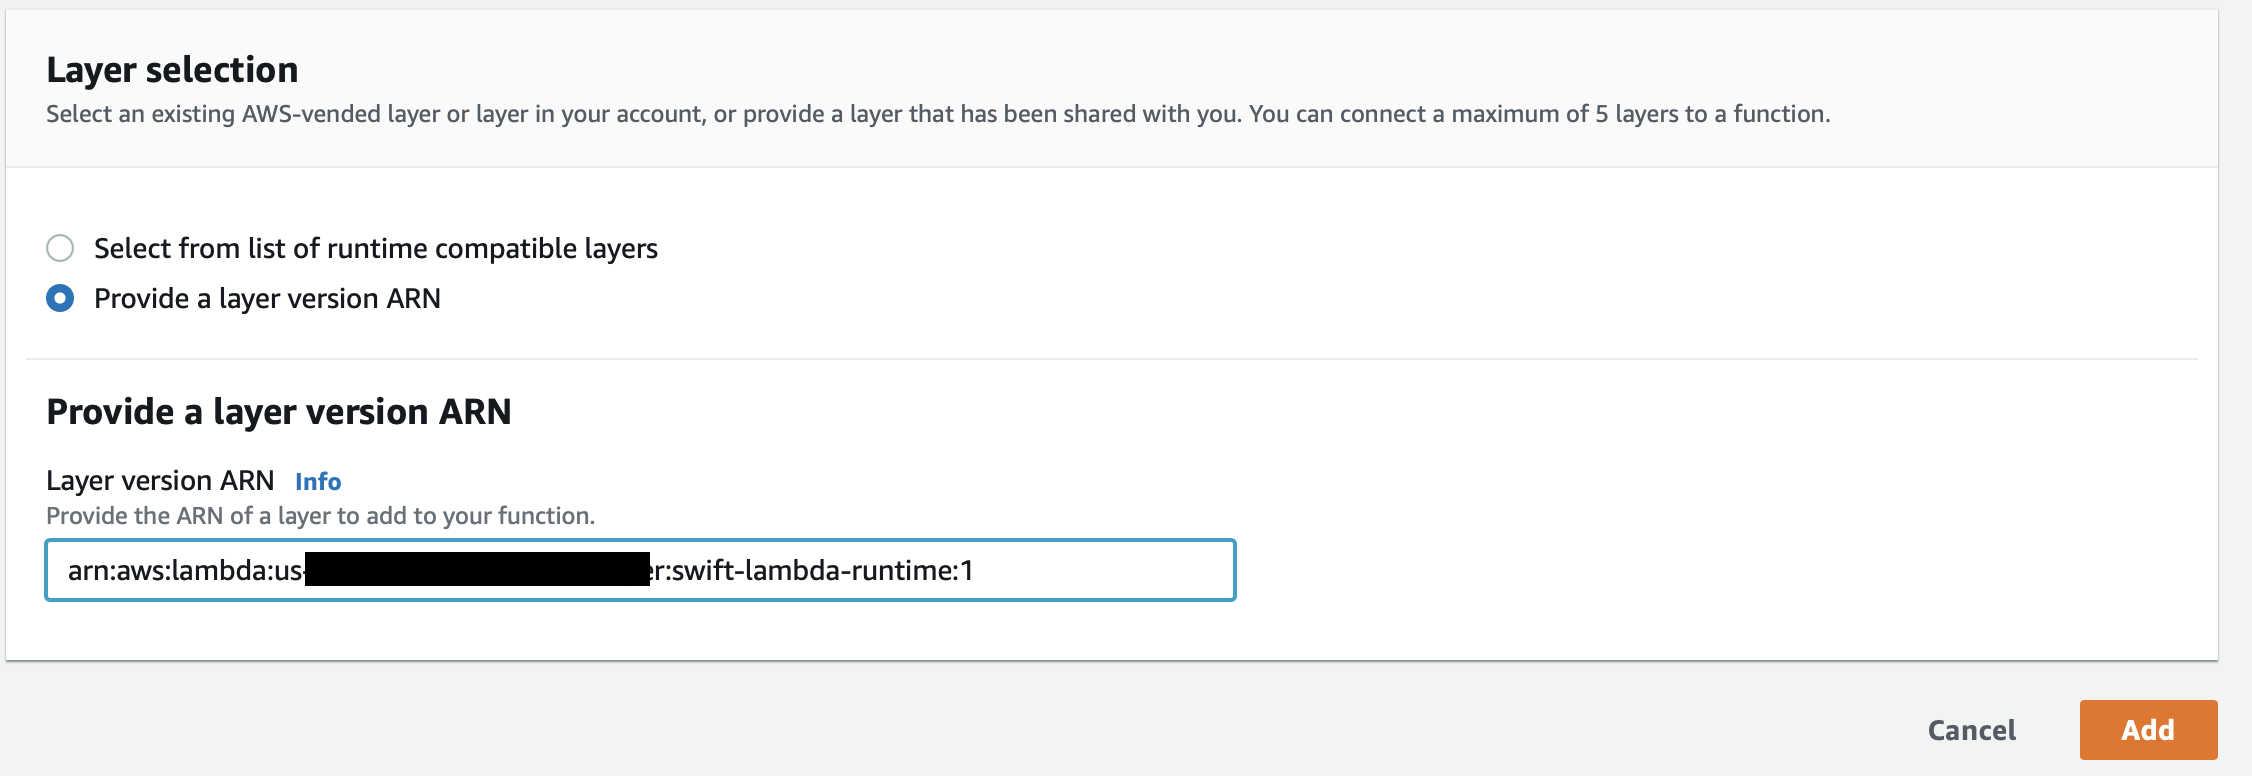
- Here you will be able to add the runtime Layer. You can either select one from a list or provide an ARN. I’ve had little luck with selecting from a list, so I usually default to providing the ARN. If you are using the ARN, simply use the ARN for the AWS Layer you created in the previous section and click Add.
- Here you will be able to add the runtime Layer. You can either select one from a list or provide an ARN. I’ve had little luck with selecting from a list, so I usually default to providing the ARN. If you are using the ARN, simply use the ARN for the AWS Layer you created in the previous section and click Add.
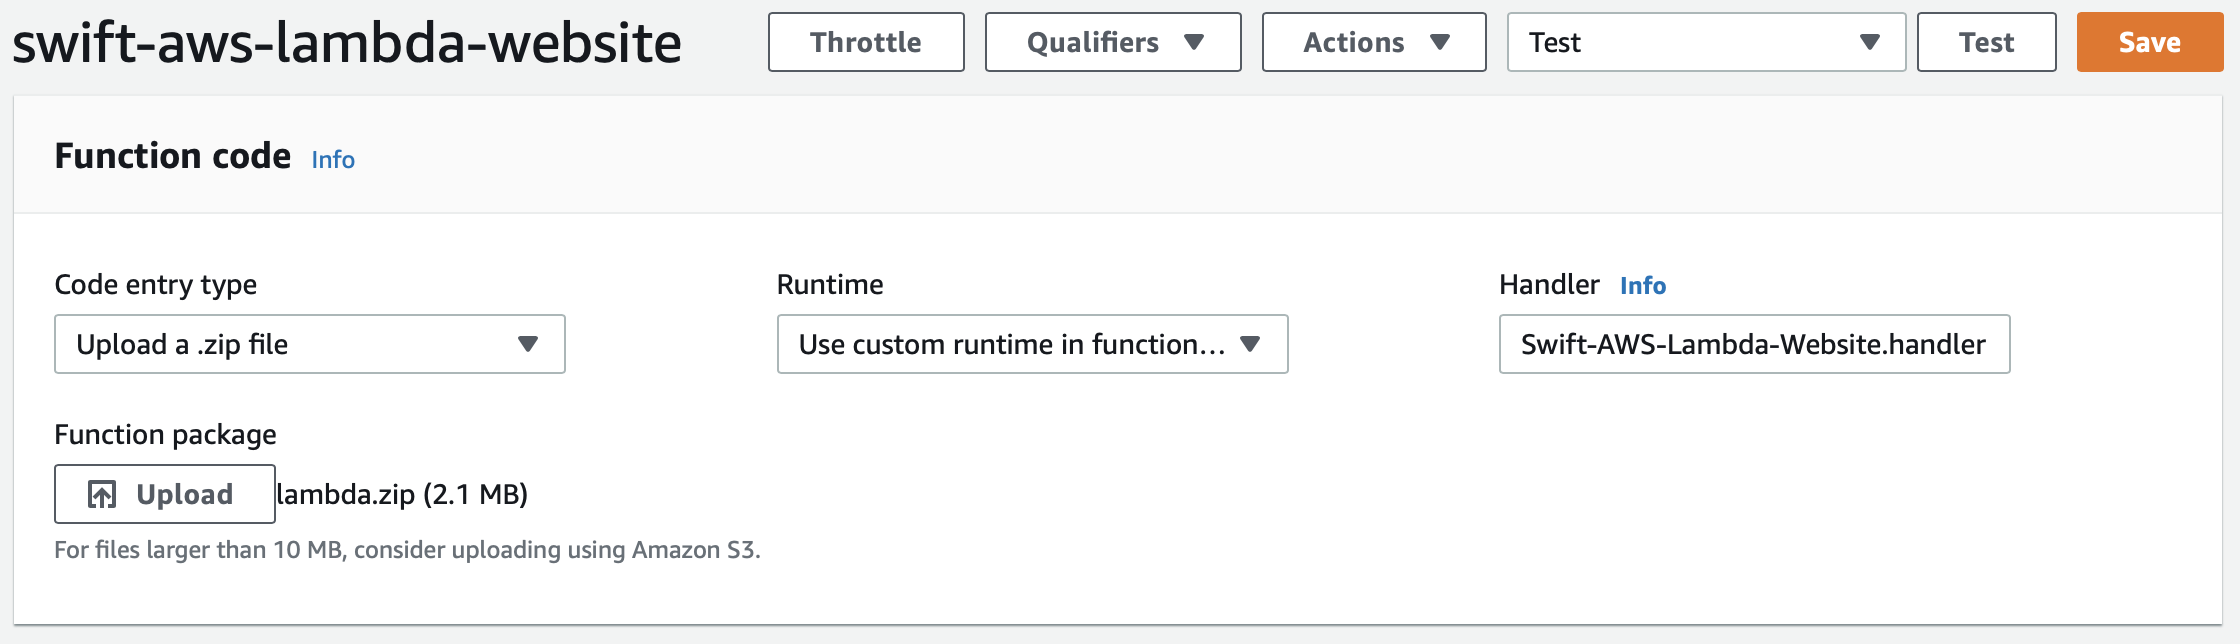
- Now that we have the Swift runtime setup, our Swift executable will be able to run! We just need to upload the Swift executable that we created in Part 1. If you want to skip creating the executable, you can download an already compiled one from the Github repo for these posts: example Swift website generator executable (lambda.zip).
- Make sure you have your Lambda function’s name selected, which is right above the Layers button that we previously selected to add the Swift AWS Layer runtime.
- Scroll down to the Function code section and look for Code entry type.
- Click the dropdown menu and select
Upload a .zip file. - Below the dropdown menu is the upload button. Click this to upload the Swift executable.
- Make sure the Runtime is set to use a custom runtime.
- Update the Handler to be
Swift-AWS-Lambda-Website.handler- This tells Lambda what Swift function to run when triggered. This just has to match the function name that we created in the first part of these posts.
- Press Save, which should be at the top right of the screen.
- We are ready to test!! Click the Test button at the top right of the screen (next to the Save button).
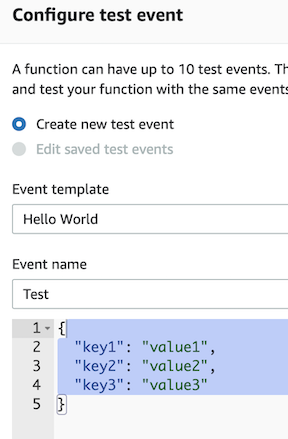
- The first time you press this button, you will be prompted to configure the test event. You can edit the payload that will be delivered to your Lambda function. In our case this doesn’t make much of a difference, but if your Swift website needs to take in some information like a customer id to pull some data out of a database, you would probably want to make a test that provides a test customer id. In this example, you may also want a test an invalid customer id to test some edge cases.
- Since our use case is simple, choose whatever names you want to give the test, feel free to delete the json between the brackets, and press Save.
- Press the Test button again and you should see a green box with the result of running the Swift generate website code — HTML/CSS 🎉!
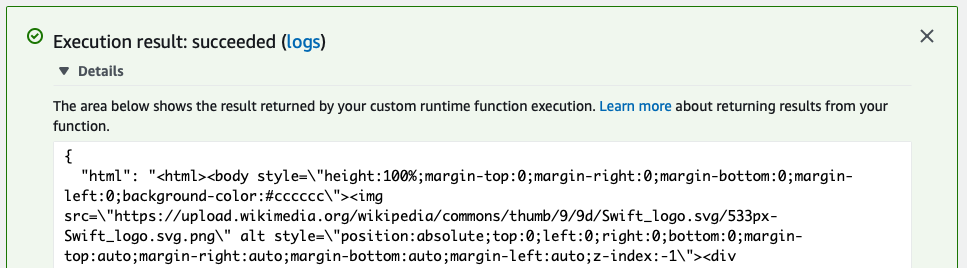
- If you wanted to, you could copy the generated HTML/CSS to an
.htmlfile to see the website in action that was created by running your newly created Lambda function!
- If you wanted to, you could copy the generated HTML/CSS to an
- If your test runs and a red error box appears, don’t panic! Read the error message and step through everything you did to troubleshoot. Also, feel free to reach out if you are really stuck :).
AWS API Gateway
Now that we have a Lambda function that is ready to generate our HTML/CSS, we need a way to run it other than hitting the Test button 🙃. API Gateway allows us to map an incoming URL request to trigger our Lambda function; The result of which then gets sent back and we have a website!
- Search for and go to API Gateway from the AWS console.
- Create a new API by clicking Create API at the top.
- Most of the defaults are fine. Just give your new API a name (and a description if you want).
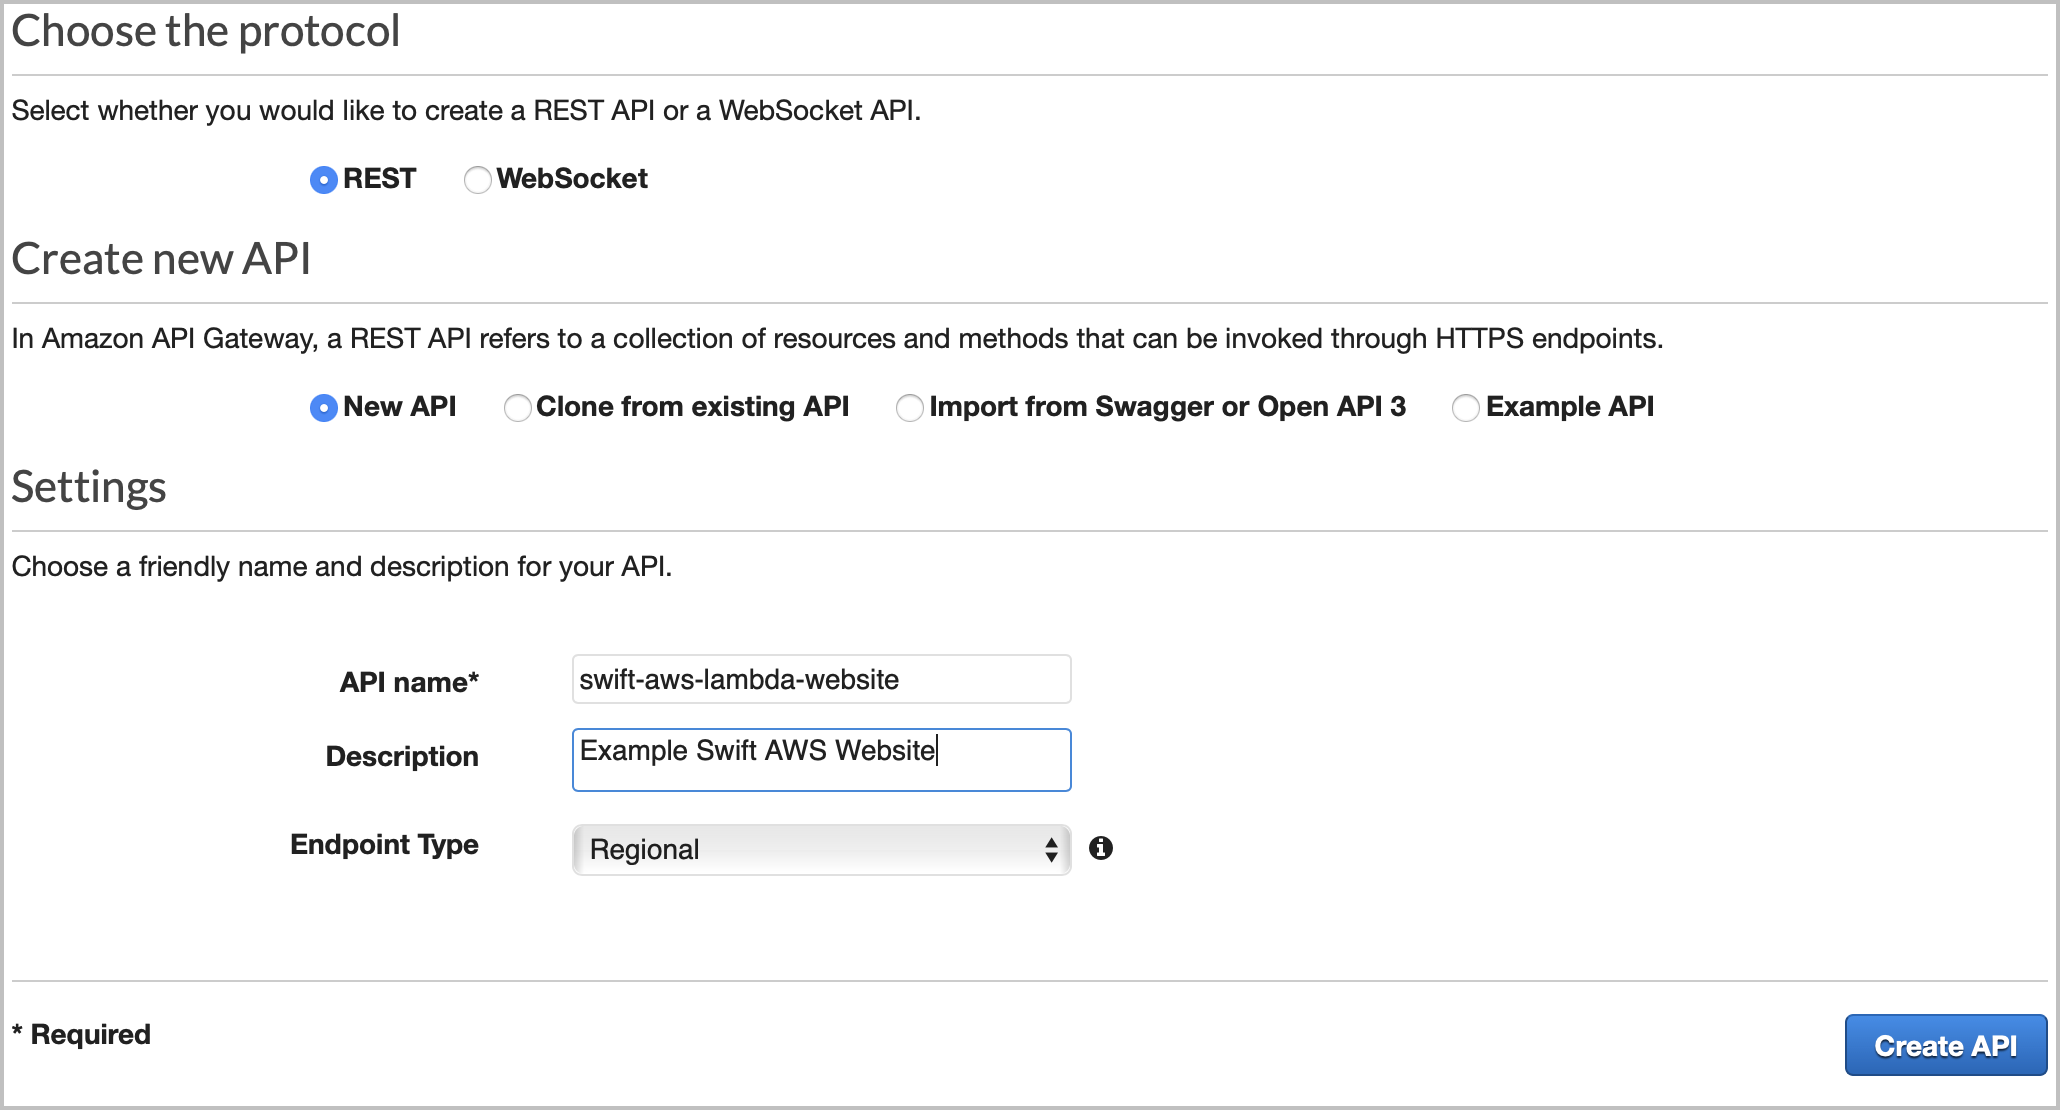
- With the API initially created, we need to configure it to return the generated HTML/CSS from our Lambda function. First step is to set up the method for your endpoint. In this case, we want a GET method.
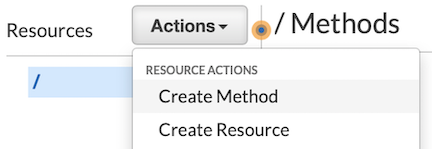
- With your API selected on the left, select the Actions dropdown.
- Click on Create Method.
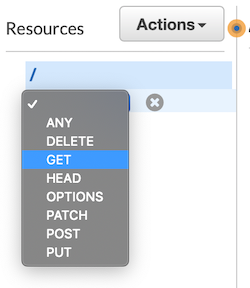
- Click the dropdown to select the type of method. Click GET from the options.
- Accept the GET method choice by clicking the little check button.
- Next you will be asked to choose the integration point, which is similar to saying what would you like to do when your URL gets called? If you don’t see the below screen, click on the GET request method that you just created to bring it up.

- Choose Lambda Function at the top.
- Give the name of your Lambda function at the bottom. When typing in this field, you should get auto complete to help you select your Lambda function.
- Press save.
- You will be asked to add permission to the Lambda function. Press ok.
- Now that we have an API with a GET method that is hooked up to call our Lambda function, we need to configure the GET method a bit. If you don’t have your GET method selected, click it now.
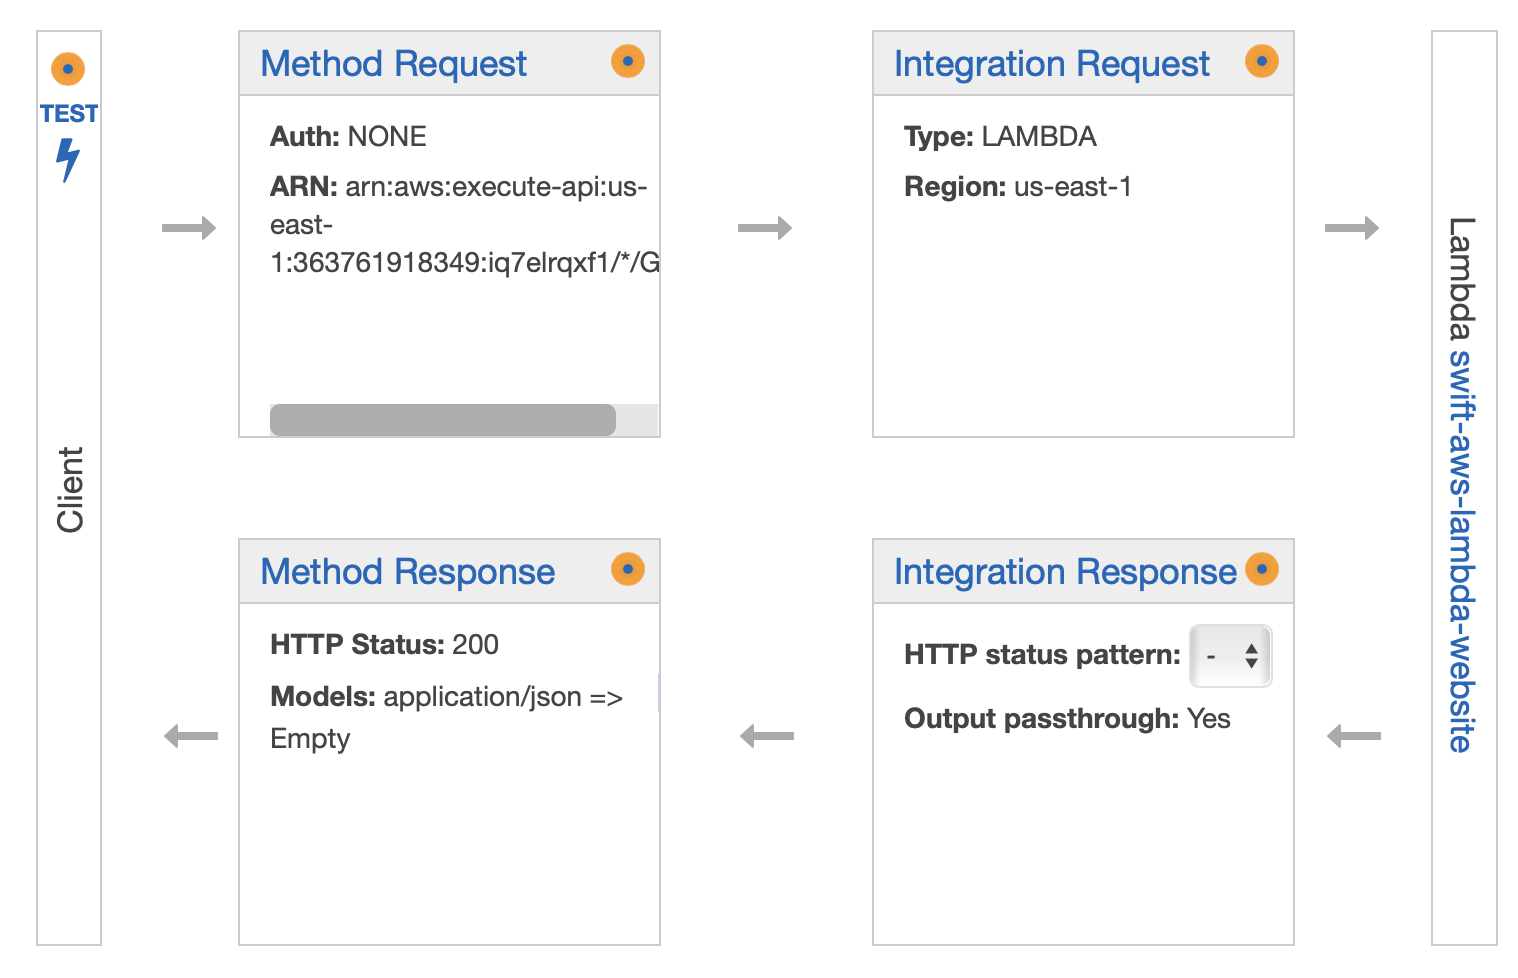
- Aside: The right side details that this opens up can be a little intimidating. From a high level, this shows the flow for a request coming in and the response going out. The left most rectangle shows the client and gives you the option to test your endpoint (we will be using this later). The top two boxes allow you to configure authentication and then where the request gets routed to, which ultimately ends up at the right most rectangle — at our Lambda function! Following the bottom two boxes, the response from our Lambda function gets processed and sent out back to the client (client = the thing calling your endpoint).
- Let’s start configuring the method by clicking on Method Response.
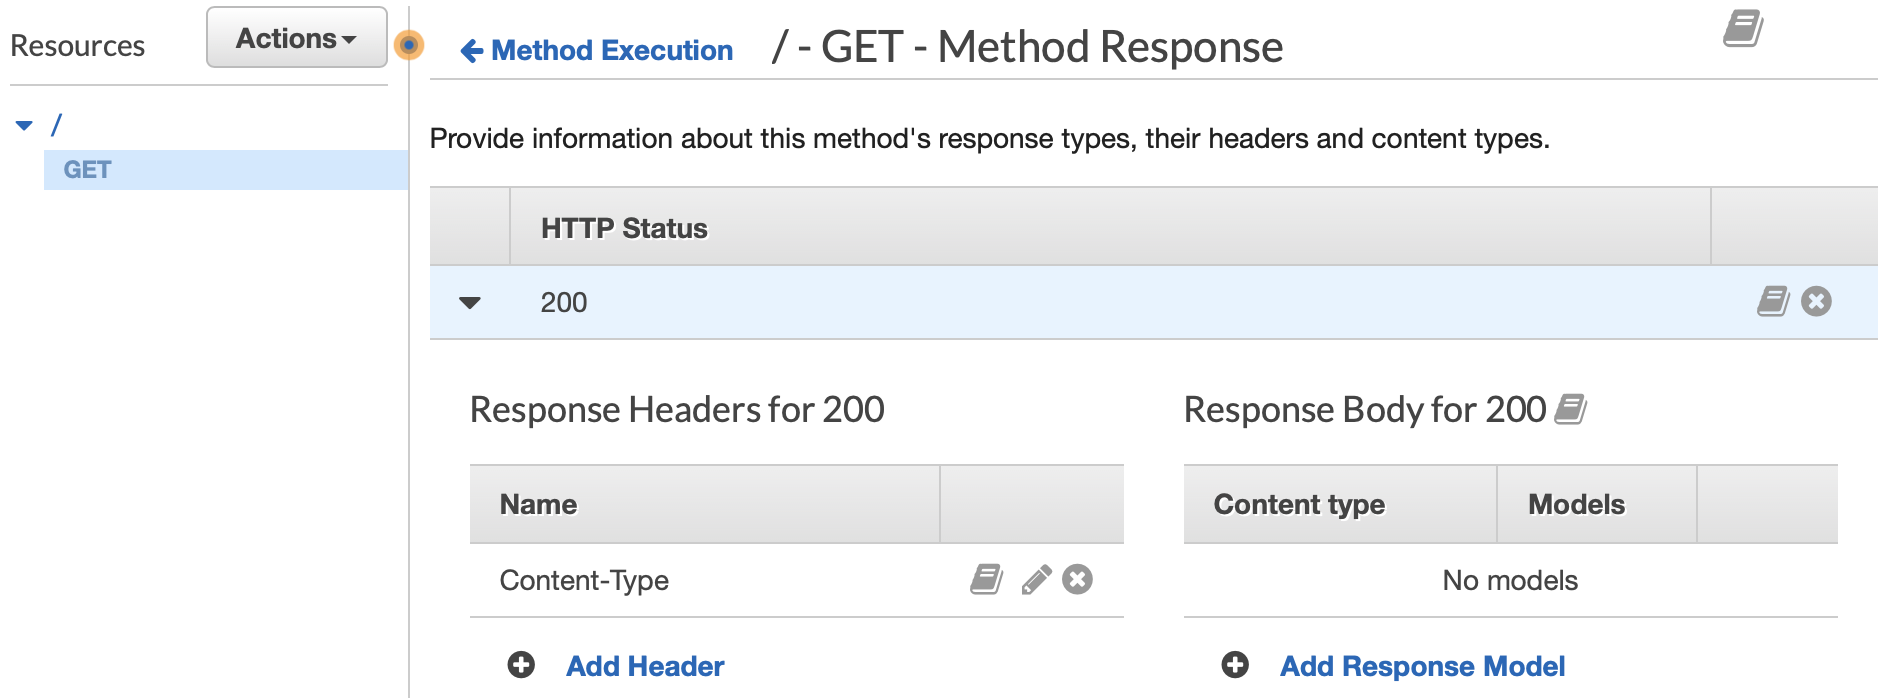
- click on the dropdown under HTTP Status. Change the following settings:
- Under Response Headers for 200 add header with name Content-Type
- Delete what is under Response Body for 200
- click on the dropdown under HTTP Status. Change the following settings:
- Return to Method Execution.
- If you ever lose your place just reselect the GET method as you did before to see the flow block diagram.
- Select Integration Response.
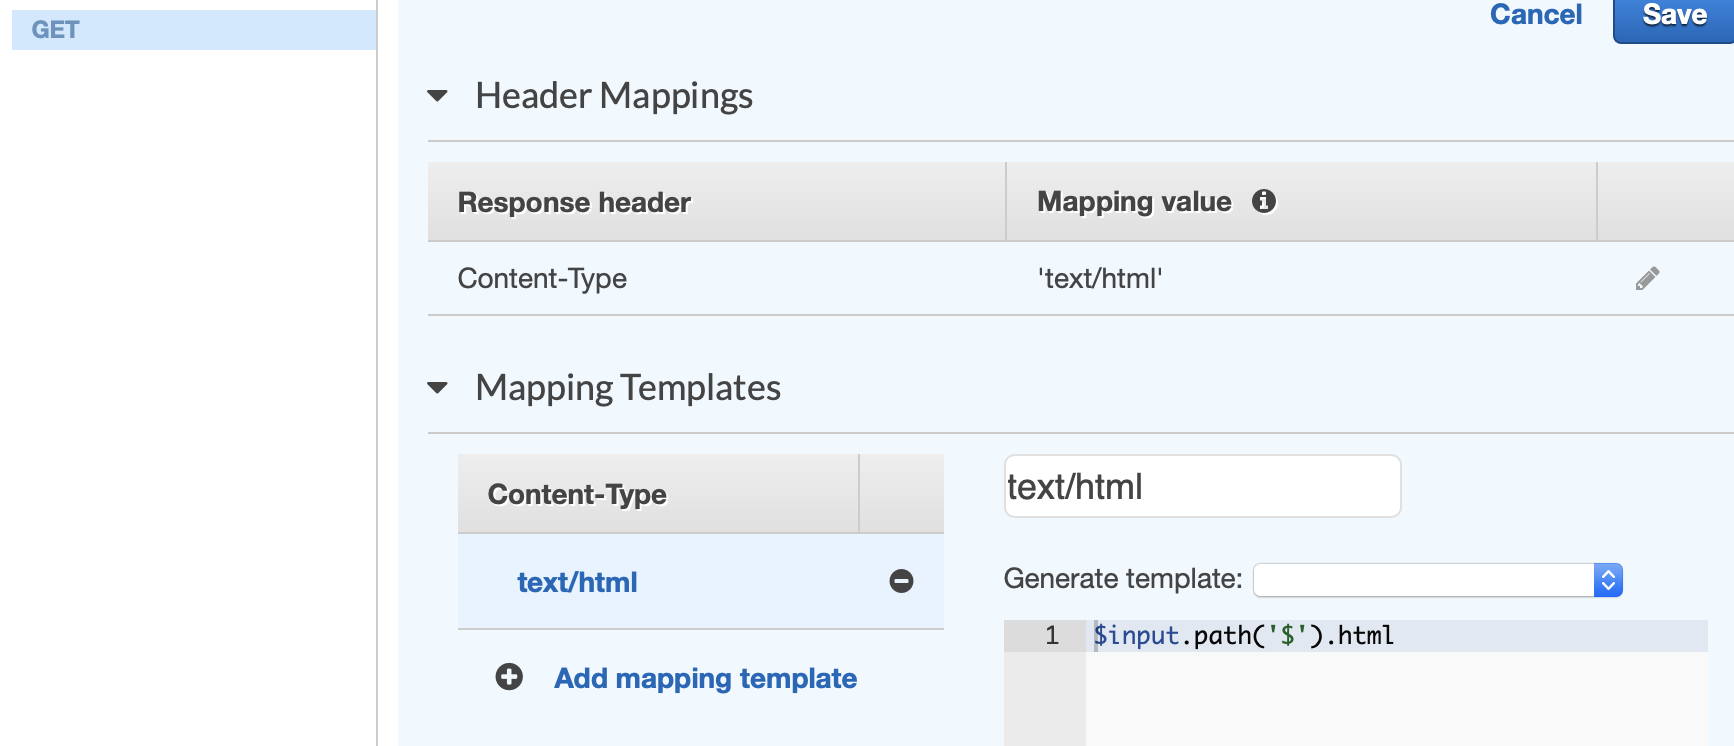
- Now, click to show the dropdown for both Header Mappings and Mapping Templates.
- First, we need to make sure that the respone that goes back has a content type of HTML. This tells the web browser to try and render the response as webpage.
- Edit the Header Mappings as follows:
- Response header ->
Content-Type - Mapping value ->
'text/html'
- Response header ->
- Next, we need to edit the Mapping Templates to pull the HTML/CSS out form our Lambda function’s response and return that.
- Under Mappings Templates delete application/json, if that is listed.
- Click Add mapping template and add text/html
- On the right, put this into the text box:
$input.path('$').html- Note: If you don’t see a text box to the right, you will need to click on the text/html that you just added in the previous step.
- Press save at the bottom.
- Aside: The right side details that this opens up can be a little intimidating. From a high level, this shows the flow for a request coming in and the response going out. The left most rectangle shows the client and gives you the option to test your endpoint (we will be using this later). The top two boxes allow you to configure authentication and then where the request gets routed to, which ultimately ends up at the right most rectangle — at our Lambda function! Following the bottom two boxes, the response from our Lambda function gets processed and sent out back to the client (client = the thing calling your endpoint).
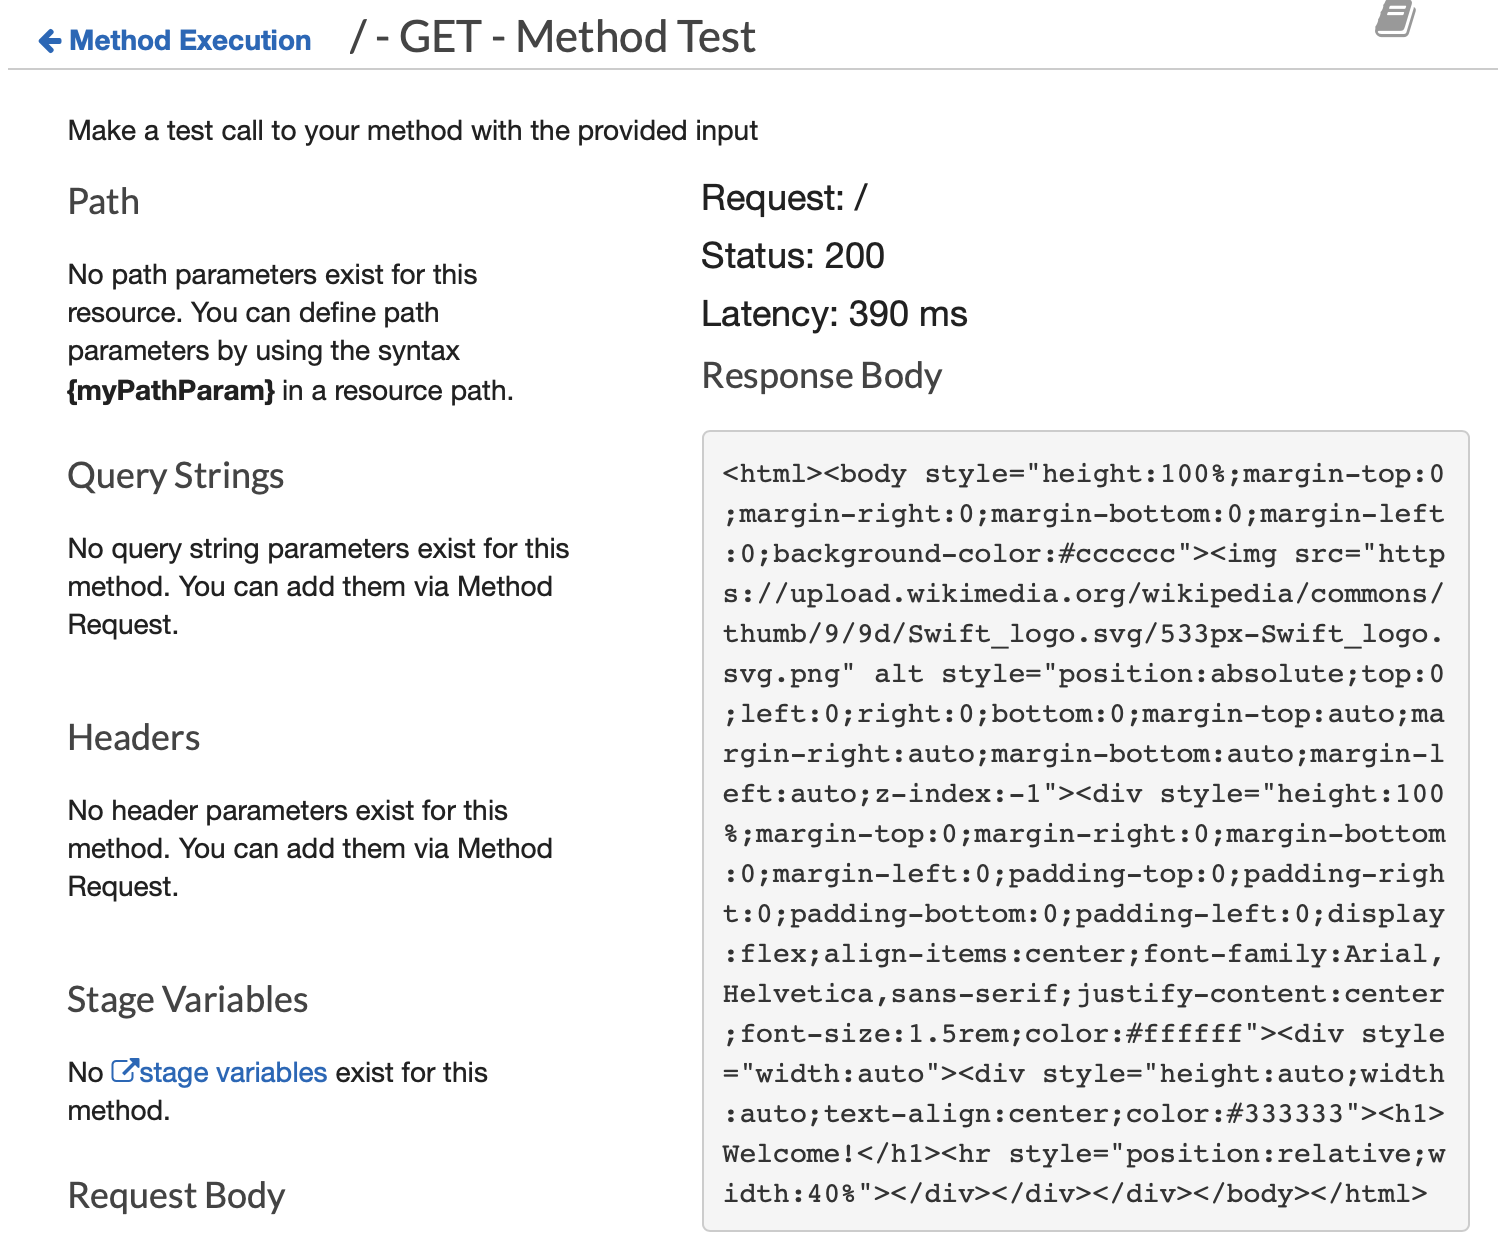
- With your endpoint fully set up, let’s test it!
- Start by going back to the overview flow block diagram of your GET endpoint. The overview looks like this.
- Click Test on the left side of the flow block diagram.
- On this screen click Test.
- You should see something like this (you may need to scroll down a bit):
- We are real close now 🤓! With the above API Gateway setup complete and tested, we just need to make this endpoint publicly available. Go back to your API and click the dropdown for Actions like you did before.
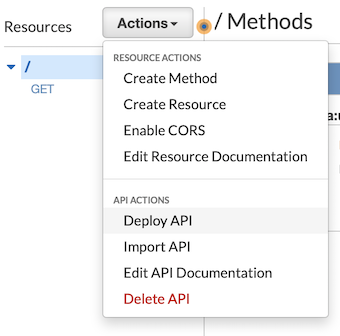
- Under API Actions select Deploy API.
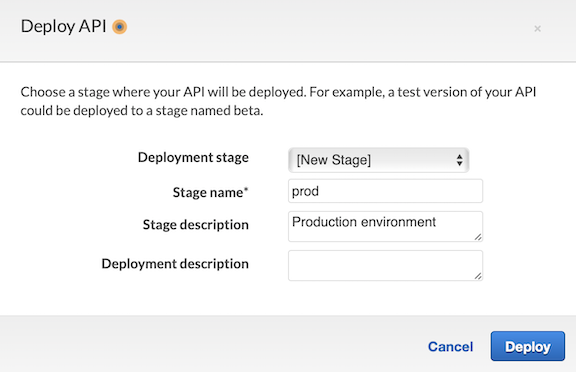
- You will need to select a stage like production or development. Since we haven’t set up a stage yet, let’s make new one and call it prod for production and click Deploy.
- When this completes, you will have a fully functional AND publicly available URL!
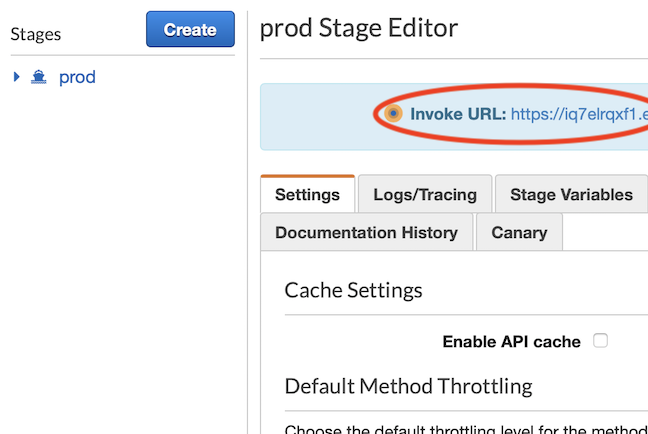
- The URL will not be pretty, but you can copy and paste it into a web browser to see you webpage in action 🎉😎🎉!
- Under API Actions select Deploy API.
Custom URL
Even though we just made a publicly available URL, having a website with a custom URL is a nice professional and gratifying touch.
The following custom URL steps use GoDaddy because that is where I started buying domains, but where you buy them is not really that important. As noted in the previous part of these posts, if I was going to buy a new domain(s) I would consider going with Amazon Route 53 to have everything under the AWS umbrella.
- To start, we need to make a certificate to both verify that we own the domain and to give us a secure website (i.e., https). After the certificate is created, we will use this in API Gateway to create a custom domain name that maps to the API we created in the last section.
- In the AWS console, search for and go to Certificate Manager.
- Click on Request a certificate.
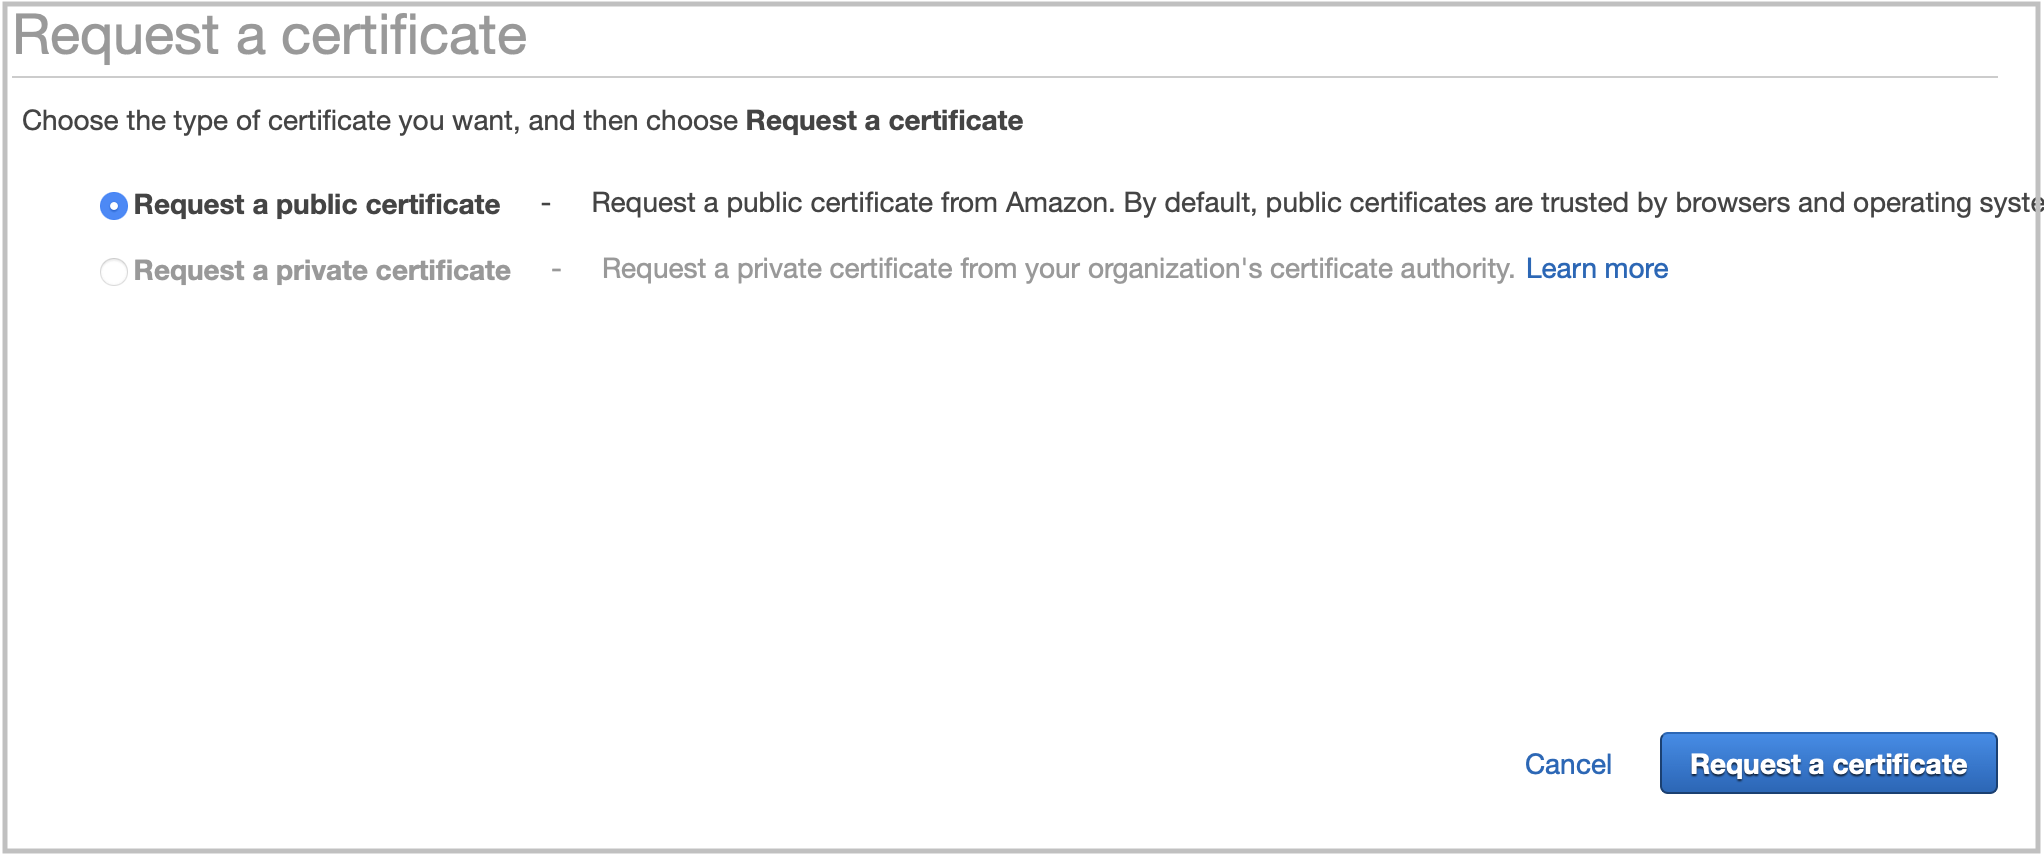
- Select Request a public certificate and click Request a certificate at the bottom.
- Next, you will be asked to put in the domain name that you want.
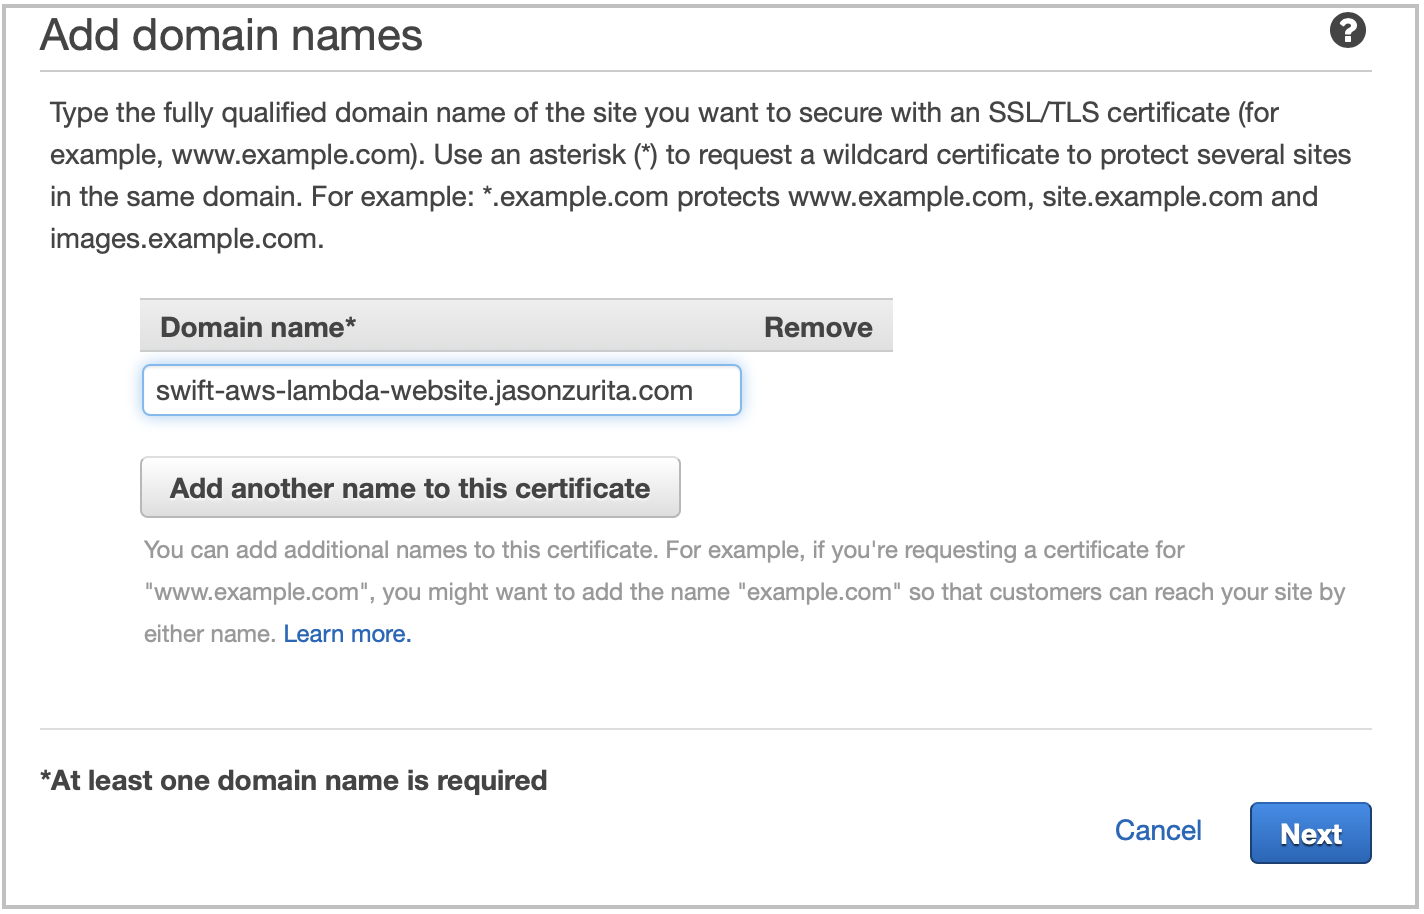
- I choose to go with a subdomain because I already use jasonzurita.com for this site — the subdomain used for the acompanying example website is the swift-aws-website before the main domain name. You should choose the domain, or subdomain, that is right for you.
- Click Next.
- Here you will need to select a validation method. Choose DNS validation and click on Review.
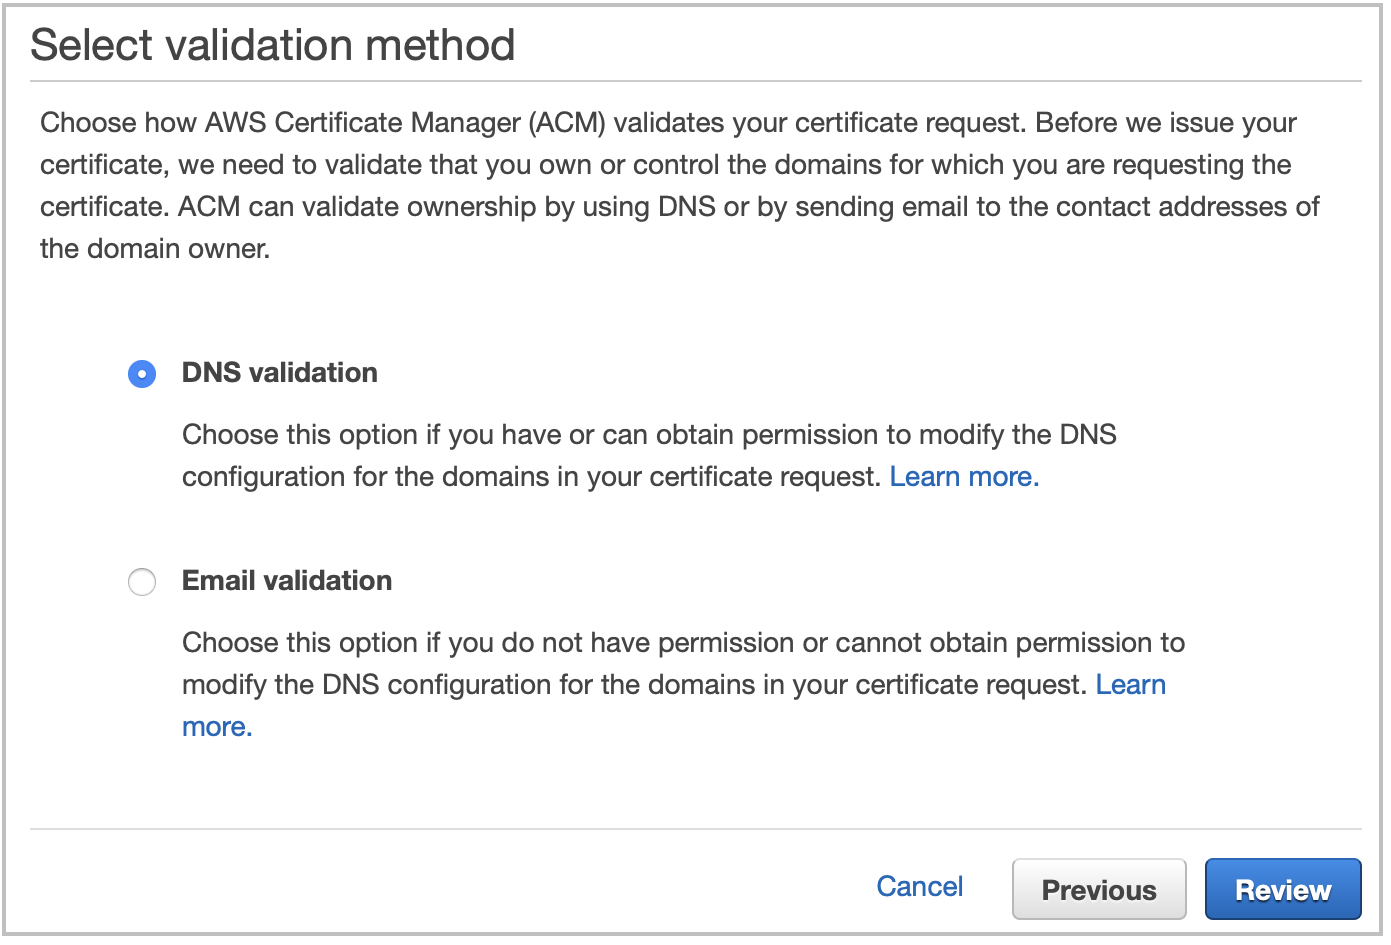
- Make sure everything you put in looks correct and click on Confirm and request at the bottom.
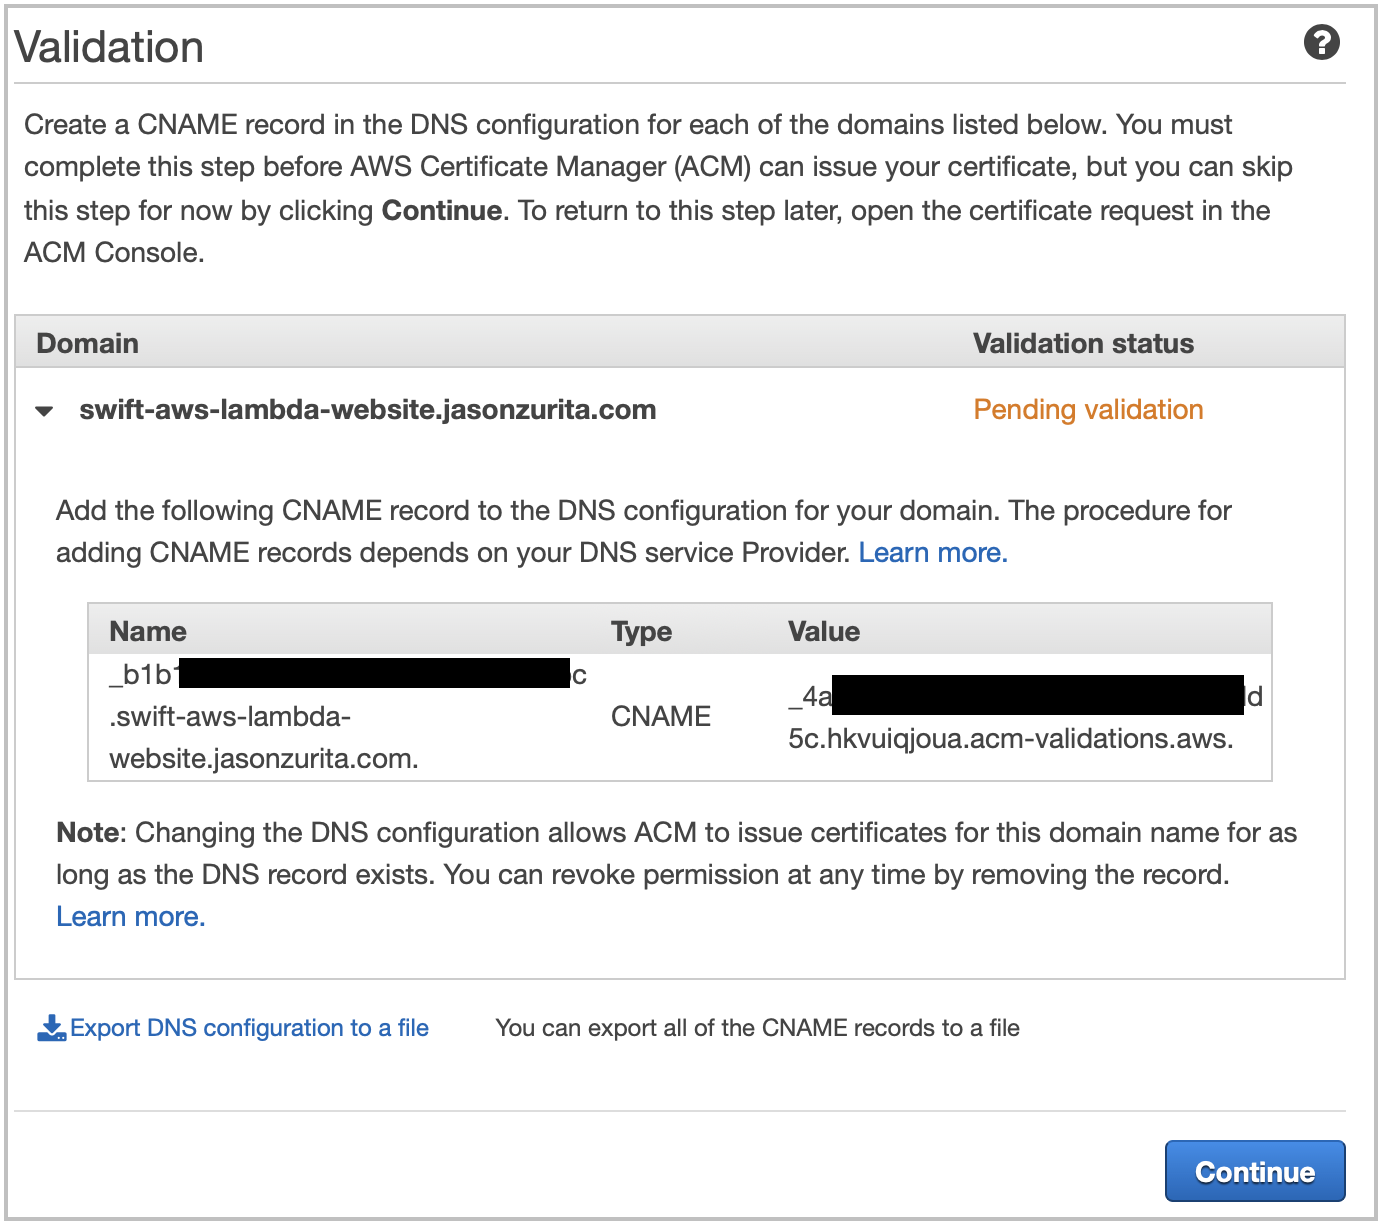
- On the main Certificate manager dashboard, you will see that your certificate is created and Pending validation.
- We need to validate the certificate to prove that we own the domain.
- We need to validate the certificate to prove that we own the domain.
- In order to validate your certificate, we need to add the CNAME that AWS generated to your DNS configuration, GoDaddy in my situation.
- Note: CNAME record (Canonical Name record) is using in DNS to map one domain name to another. In our case, a map from our custom domain to the API gateway domain we made.
- To see the CNAME click on the certificate you just created and click on the dropdown in the Domain section.
- You should now see Name, Type, and Value, where Type is CNAME.
- Keeping the above information available, go to your DNS provider’s website (GoDaddy in my case) and log in.
- Navigate to your custom domain’s DNS management section and add a CNAME entry using the Name and Value above.

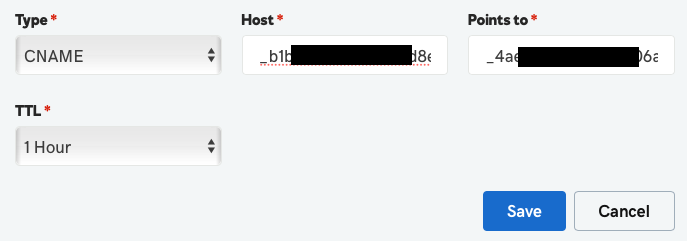
- Name goes into the Host field and value goes into the Value field.
- Note: For GoDaddy, when you enter the Host, make sure to leave off the root domain when doing so. I am not sure if other DNS providers do this, but GoDaddy implicitly assumes the root domain at the end of what you enter. Continuing on this tangent, if you ever want to enter the root domain, GoDaddy let’s you put in a @ to represent that. This was a subtle got ya that caused me some pain.
- Name goes into the Host field and value goes into the Value field.
- Press Continue.
- After you do this, go back to AWS Certificate Manager and { refresh ? }, and you should see your certificate turn to say Issued!

- If certificate validation doesn’t happen right away, you may need to give the newly added CNAME some time to propagate.
- If certificate validation doesn’t happen right away, you may need to give the newly added CNAME some time to propagate.
- Now we are ready to use our newly created certificate. { this whole section needs to be verified }
- Search for and go to API Gateway.
- Select Custom Domains from the left side bar.
- Click on Create Custom Domain Name.
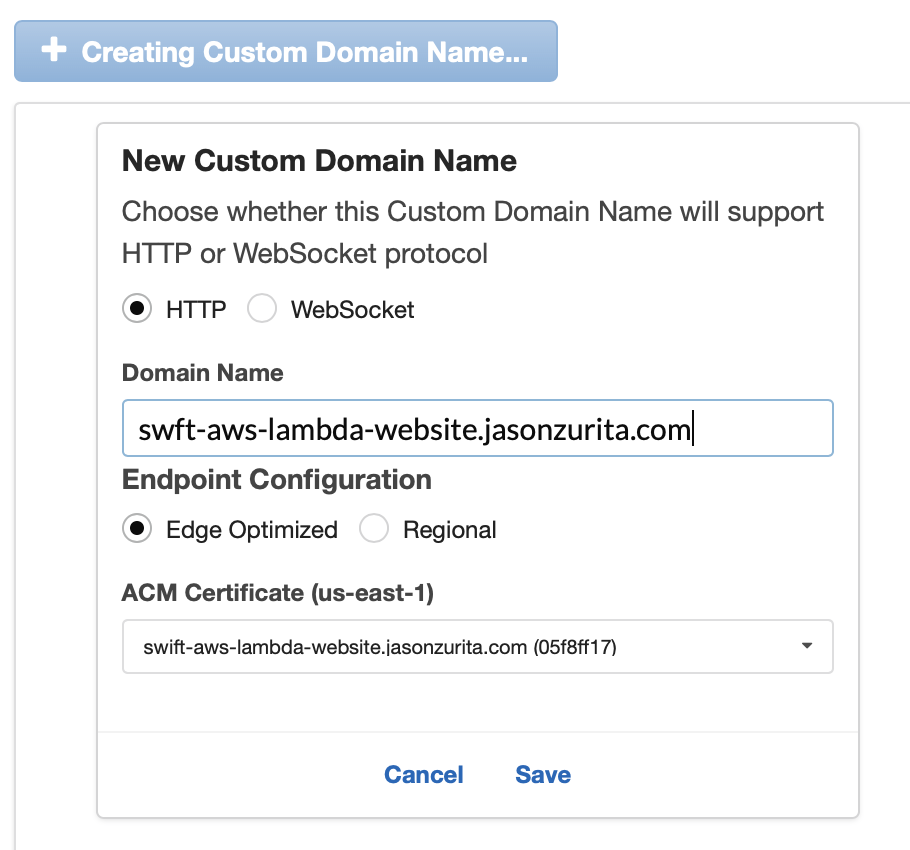
- Put in your domain name.
- You can select either Edge Optimized or Regional. Select Regional so that your custom domain gets deployed quickly.
- Edge Optimized will produce a custom domain that is faster to access for your end users. It is good practice to select this if you are deploying a production website.
- Select your newly made certificate.
- Click Save.
- Your custom domain setup may take some time to process.
- Once your custom domain has been set up, we need to add a mapping to trigger the right API path. This is simple in our case since we only have one path, but you can imagine that there could be other paths for our API like a customer screen (e.g.,
<domain_name>/products).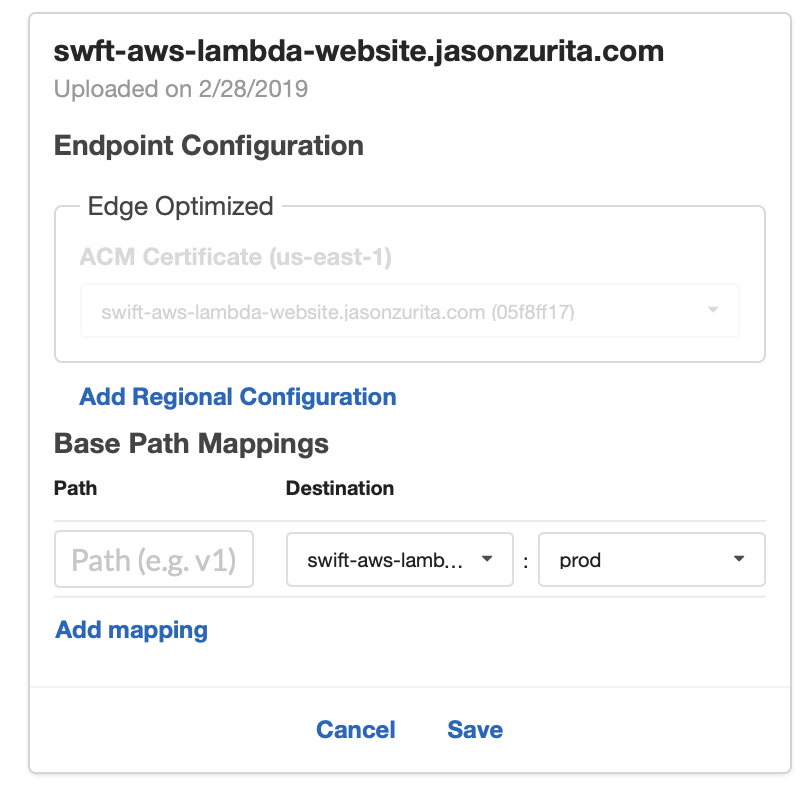
- Set Path to “
/”. - Set Destination to our previously created API.
- And, set the last field to
Prod.
- Set Path to “
- Click Save. Your custom domain should look like this after being setup:
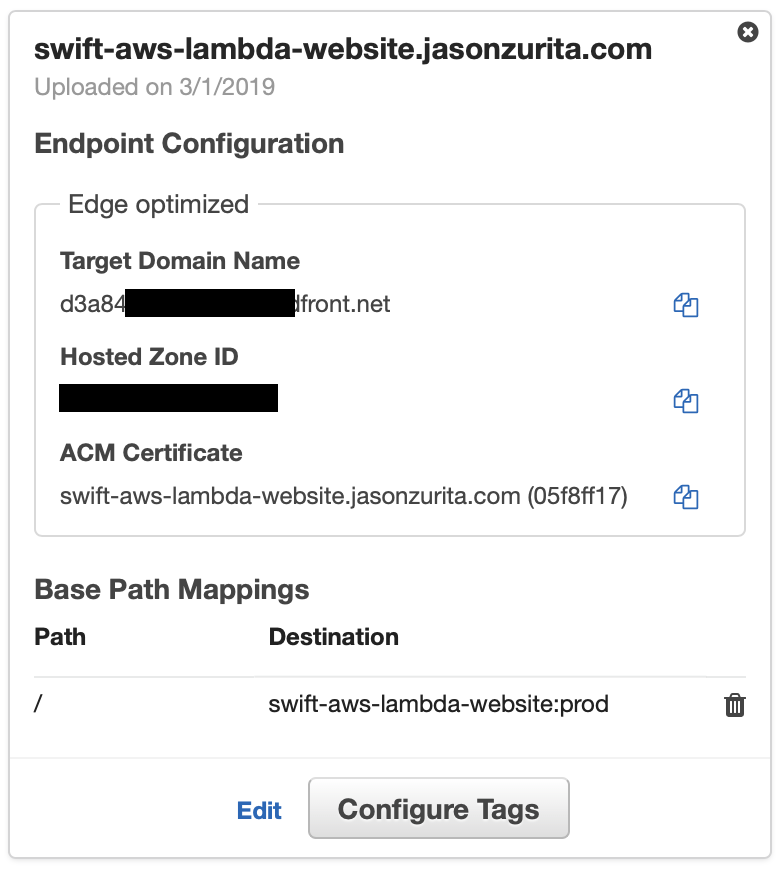
-
The final thing we need to do is add one final CNAME to our DNS to map the custom domain we want to the custom domain name that we just set up!
Note: After setting this up, when a user types in your custom domain into the browser, they will get mapped to the custom domain in the previous step. When API Gateway receives the request, AWS will cross check against the legitimacy of the custom domain name using the certificate we created. Then API Gateway will know where to route the request — our Lambda function!
- Using the following, complete the same steps to add a CNAME to your DNS as before. { check this link }
- For the Host field, enter the custom domain name you want. In my case it was swift-aws-lambda-website. If you want to use your root domain (e.g., jasonzurita.com), GoDaddy uses @ to represent the root domain.
- For the Value field, enter the API Gateway Custom Domain Name’s Target Domain Name as seen in the previous section’s last screenshot.
- Once the CNAME has been added and processed, when you type in your custom domain into the browser you will see your website that is generated from Swift 🎊 🎉 🍾!!
- Using the following, complete the same steps to add a CNAME to your DNS as before. { check this link }
Some parting thoughts
The current state of this implementation is a great first step! Some additional thoughts come to mind:
- The example website here is a single, simple, page. Pushing this to see where the trade-offs of this kind of website would be an interesting learning exercise. Given time, I may try to re-implement my blog using this type of tech stack. Here are a few suggestions to begin pushing exploring the true validity of a website like this:
- Querying a database while generating the website.
- Incorporating a content management system (CMS). Probably headless like Forestry and Contentful.
- Incorporating HTTPS requests while generating the website.
- Multiple page routing. Maybe routing using API Gateway with separate Lambdas or Lambda Layers for each page.
- For dynamic things like animations we will still need to use JavaScript. Figuring out a way to incorporate JavaScript would be helpful and probably not too difficult. Taking this a step further, exploring Web Assembly with this tech stack would be interesting.
- With the introduction of SwiftUI, I would be very interested to see how that can be leveraged to generate the HTML/CSS. Here are some initial projects that came out shortly after SwiftUI was announced along these lines:
- This could make a pretty neat open source project that includes things like a script to make a template website for getting started, and AWS command line integration to facilitate updating the API Gateway, Lambda function, etc. If someone is interested in this, I would be happy to help!
Feel free to reach out on Twitter — cheers!