Linting vs Formatting: A Swift Guide — Part 2
Aside: I ran a workshop for try! Swift World on this subject. If interested, the resources are freely available including a guide that you can follow!
Summary
This is part 2/2 of a series on linting and formatting. Where part 1 was focused on the “why,” this part will provide an opinionated take on the “what and how” and will therefore be more practical.
With the background thoughts out of the way in part 1 (including specifics about the differences between linting and formatting), let’s dig into some tooling and how to set them up. This will help keep your code clean in terms of style and even provide a second set of eyes for your code in some cases.
A Recommended Setup
Having set this up several times, I have been tweaking and improving a linting and formatting setup for Apple platform apps (iOS, watchOS, etc.). Ultimately, I think I have found a pretty good setup for these guardrails that help me ship with more confidence.
From a high level, the below setup runs an auto code style formatter locally when running tests and a linter in a continuous integration (CI) environment like GitHub Actions, which auto-comments violations on pull requests (PRs). More specifics below.
Note: example config files and an example app may be found here.
Linting
The below uses GitHub Actions for CI. The setup is similar if you use something else like CircleCI or Bitrise.
Use SwiftLint in CI. SwiftLint does generate a Swift abstract syntax tree (AST) to use for analysis, so integrating it locally in Xcode would increase the build time slightly. Integrating it in CI moves that extra processing out of your local dev flow. Also, depending on when you add this to your project and how many warning you have in your app, this can add a lot of noise to your Xcode project since violations wouldshow up as in-line warnings too.
- You can have a config file to customize SwiftLint’s behavior, usually in the root of your project directory (e.g., disabling or enabling rules).
- Example lint config file.
- Run on every PR using Danger to auto-comment on your PRs (and even fail a PR if warranted).
- Example GitHub Actions config for this.
- Here is the related example Danger config file that will run SwiftLint, and here is a post on setting it up.
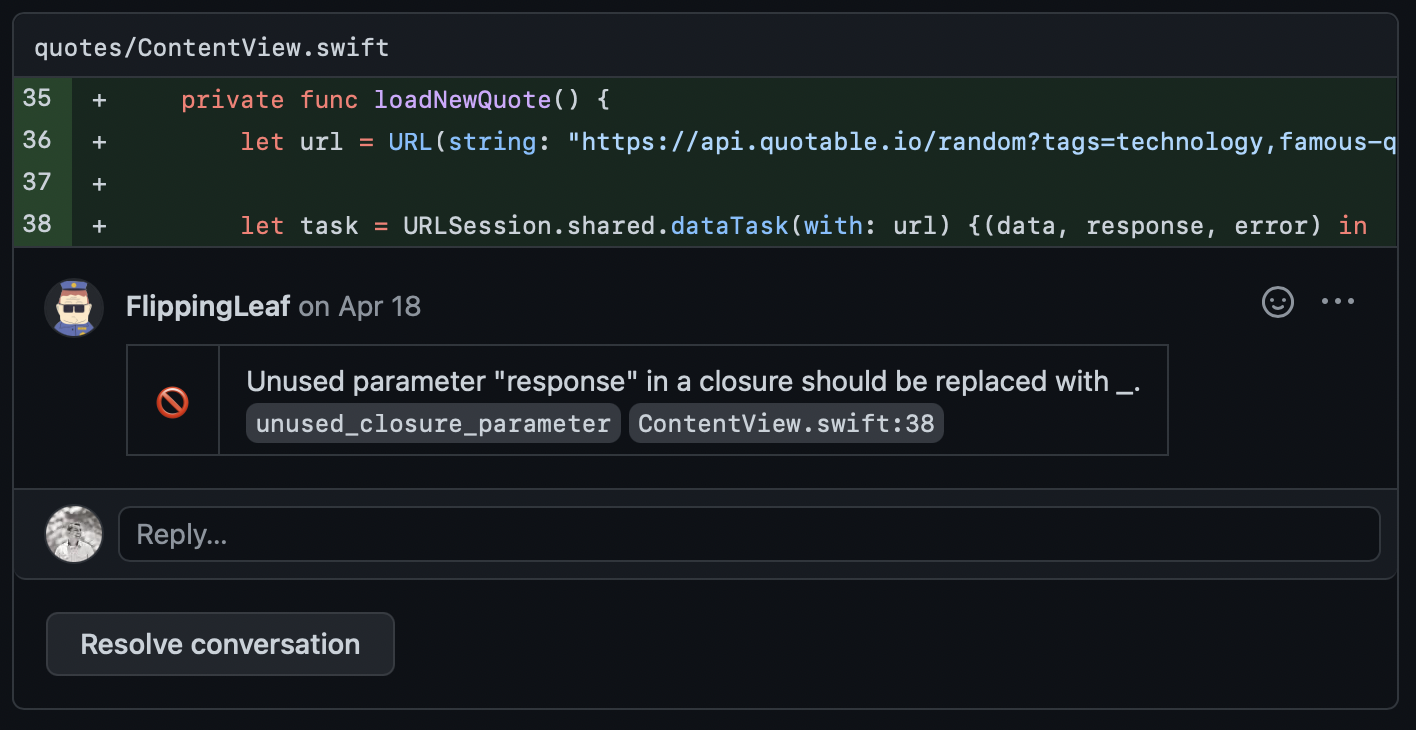
- Here is an example of Danger + SwiftLint in action in a PR. To see the example PR that this came from, check out this PR I made for a past workshop.
- Note: Danger can do a lot more than running SwiftLint. I’ve had Danger setup to automatically generate and comment on PRs with a jira ticket link, a link to an analytics spreadsheet that needed to be updated when a specific file was edited, and even to show the test coverage. In general, Danger is just another programming context, so you can do a lot with it!
Formatting
Use SwiftFormat locally via your test target to run only when you run tests and add a check to your CI system. If you ran the formatter on the main app’s target (aka every time you built the app), you would lose the undo history which is a bit annoying. Integrating it like this will reduce that unfortunate side effect. This also has the added side benefit of encouraging you to run your tests 😉.
- Here is the Xcode integration process.
- Similar to SwiftLint, you can modify the behavior of SwiftFormat (e.g., change the number of spaces, turn on rules, etc.). Example format config file.
- Run a SwiftFormat format check in CI on every PR to make sure the code has been formatted correctly, and fail the PR if it hasn’t.
- Example of setting this up using GitHub Actions.
An Overview of Notable Tools
- Generally the most used linter in the community.
- SwiftLint is based on rules which you can enable/disable and customized.
- You can disable rules either globally or in specific cases. Useful when you are knowingly breaking a rule.
- You can define custom rules.
- Does increase compile time due to its use of SourceKit (i.e., Swift code needs to be turned in to Swift AST)
- Doesn’t seem be be in active development.
- Cross platform linter (Mac OS X, Xcode, Linux, Windows).
- Supports different out of the box style guides.
- Tailor parses Swift source code using the primary Java target of ANTLR.
- Several different types of output such as inline, json, HTML, etc.
- Most popular formatter for Swift code.
- Additional learning, podcast episode with the creator of SwiftFormat Nick Lockwood.
- Reformats Swift code by applying rules.
- Leaves meaning intact.
- Integration with:
- Command Line
- Xcode source editor extension (Editor > SwiftFormat)
- As an Xcode build phase
- As a Git pre-commit hook
- SwiftFormat first converts the source file into tokens, then iteratively applies a set of rules to the tokens to adjust the formatting. The tokens are then converted back into text. Therefore, this tool is very fast.
- This is an Apple official one.
- There was an official pitch for this: Swift forum conversation about Swift code style guidelines and formatter. The review of the linked proposal has been suspended in hopes to break up the discussion and focus them. Movement on this will be interesting to watch!
- Xcode plug-in to format your Swift code.
- Not as popular or feature rich as SwiftFormat above, but still interesting to check out.
- Erica Sadun’s interesting blog post about making your own.
- Also worth noting, the gist linked to in the post is a bit old now, but still fun to look at!
- Commercial tool. Swift support will cost some money.
- Code analysis like looking for bugs and code smells.
- Security platform analysis tool.
Additional thoughts
There is a lot to this subject (hence breaking this up into two parts), and I realize this setup is opinionated. More important than doing things just like described here, do what is best for your app and company. Having these tools in place in some form is better than not and it doesn’t take much to set them up!
Thanks for reading, and feel free to reach out on Twitter — cheers!